Product Image Creator: Choose by What It Preserves
A product image creator is useful only when the result still describes the product you sell. A convincing shadow cannot rescue a changed cap, softened texture, invented ingredient copy, wrong color, or impossible scale.
Choose the tool by running one controlled product through a small approval system. Give it a factual source set, define what may change, create images for named jobs, and reject any output that crosses the product-truth boundary. The winner is not the tool that makes the most dramatic first frame. It is the one your team can direct, inspect, and release repeatedly.
Define the product truth before opening the creator
Start with a source set that can answer a reviewer without guesswork. For a simple bottle, that may mean front, rear, side, dispensing detail, label close-up, measured dimensions, and one neutral color reference. For a handbag, add the open interior, hardware, strap attachments, measured strap drop, and the confirmed items included with the purchase.
The creator cannot preserve information that the source never shows. If the back label, closure, texture, or true scale is missing, return to capture. Asking software to infer a hidden fact turns a production gap into a plausible-looking error.
Turn the source set into a two-column release sheet. Keep the language observable. “Looks premium” is direction. “Pump, shoulder, collar, and label remain identical to the approved source” is an acceptance condition.
Protected fact | Release question |
|---|---|
Identity and variant | Is this the exact SKU, color, pattern, and pack-out? |
Silhouette and construction | Are proportions, seams, closures, hardware, and edges unchanged? |
Surface and color | Do material grain, transparency, gloss, texture, and approved color still match? |
Labels and marks | Is every visible word, symbol, logo, and regulatory detail exact and undistorted? |
Scale and use | Is the product physically plausible beside the person, hand, room, or prop? |
Write the protected fact first; the image job determines what else may change.
Do not protect everything equally. Background, lighting, crop, props, and mood may be open to change in a campaign frame. The same freedoms are inappropriate for a factual marketplace main image. The image job decides the change budget.
Give each image one job and one change budget
“Make product photos” is not a useful instruction. Name the frame: factual main image, material detail, on-model scale view, lifestyle context, campaign crop, or social variation. Each job needs a destination, aspect ratio, protected facts, allowed changes, and one person who can approve it.
This is the practical difference between a product image creator and a general image generator. A commerce workflow starts from a known item and preserves its identity while changing a controlled part of the scene. Some current tools expose that workflow through a source upload, scene or style choices, prompts, variations, review, and export. Photoroom's current help flow, for example, separates generation from the review and edit step. Adobe Express likewise tells users to begin with a product photo and know the intended destination before editing.
The software's marketing claims are not your acceptance test. A vendor may say it preserves shape, labels, or color. Your team still needs to compare the returned pixels with the approved source and the physical sample when one is available.
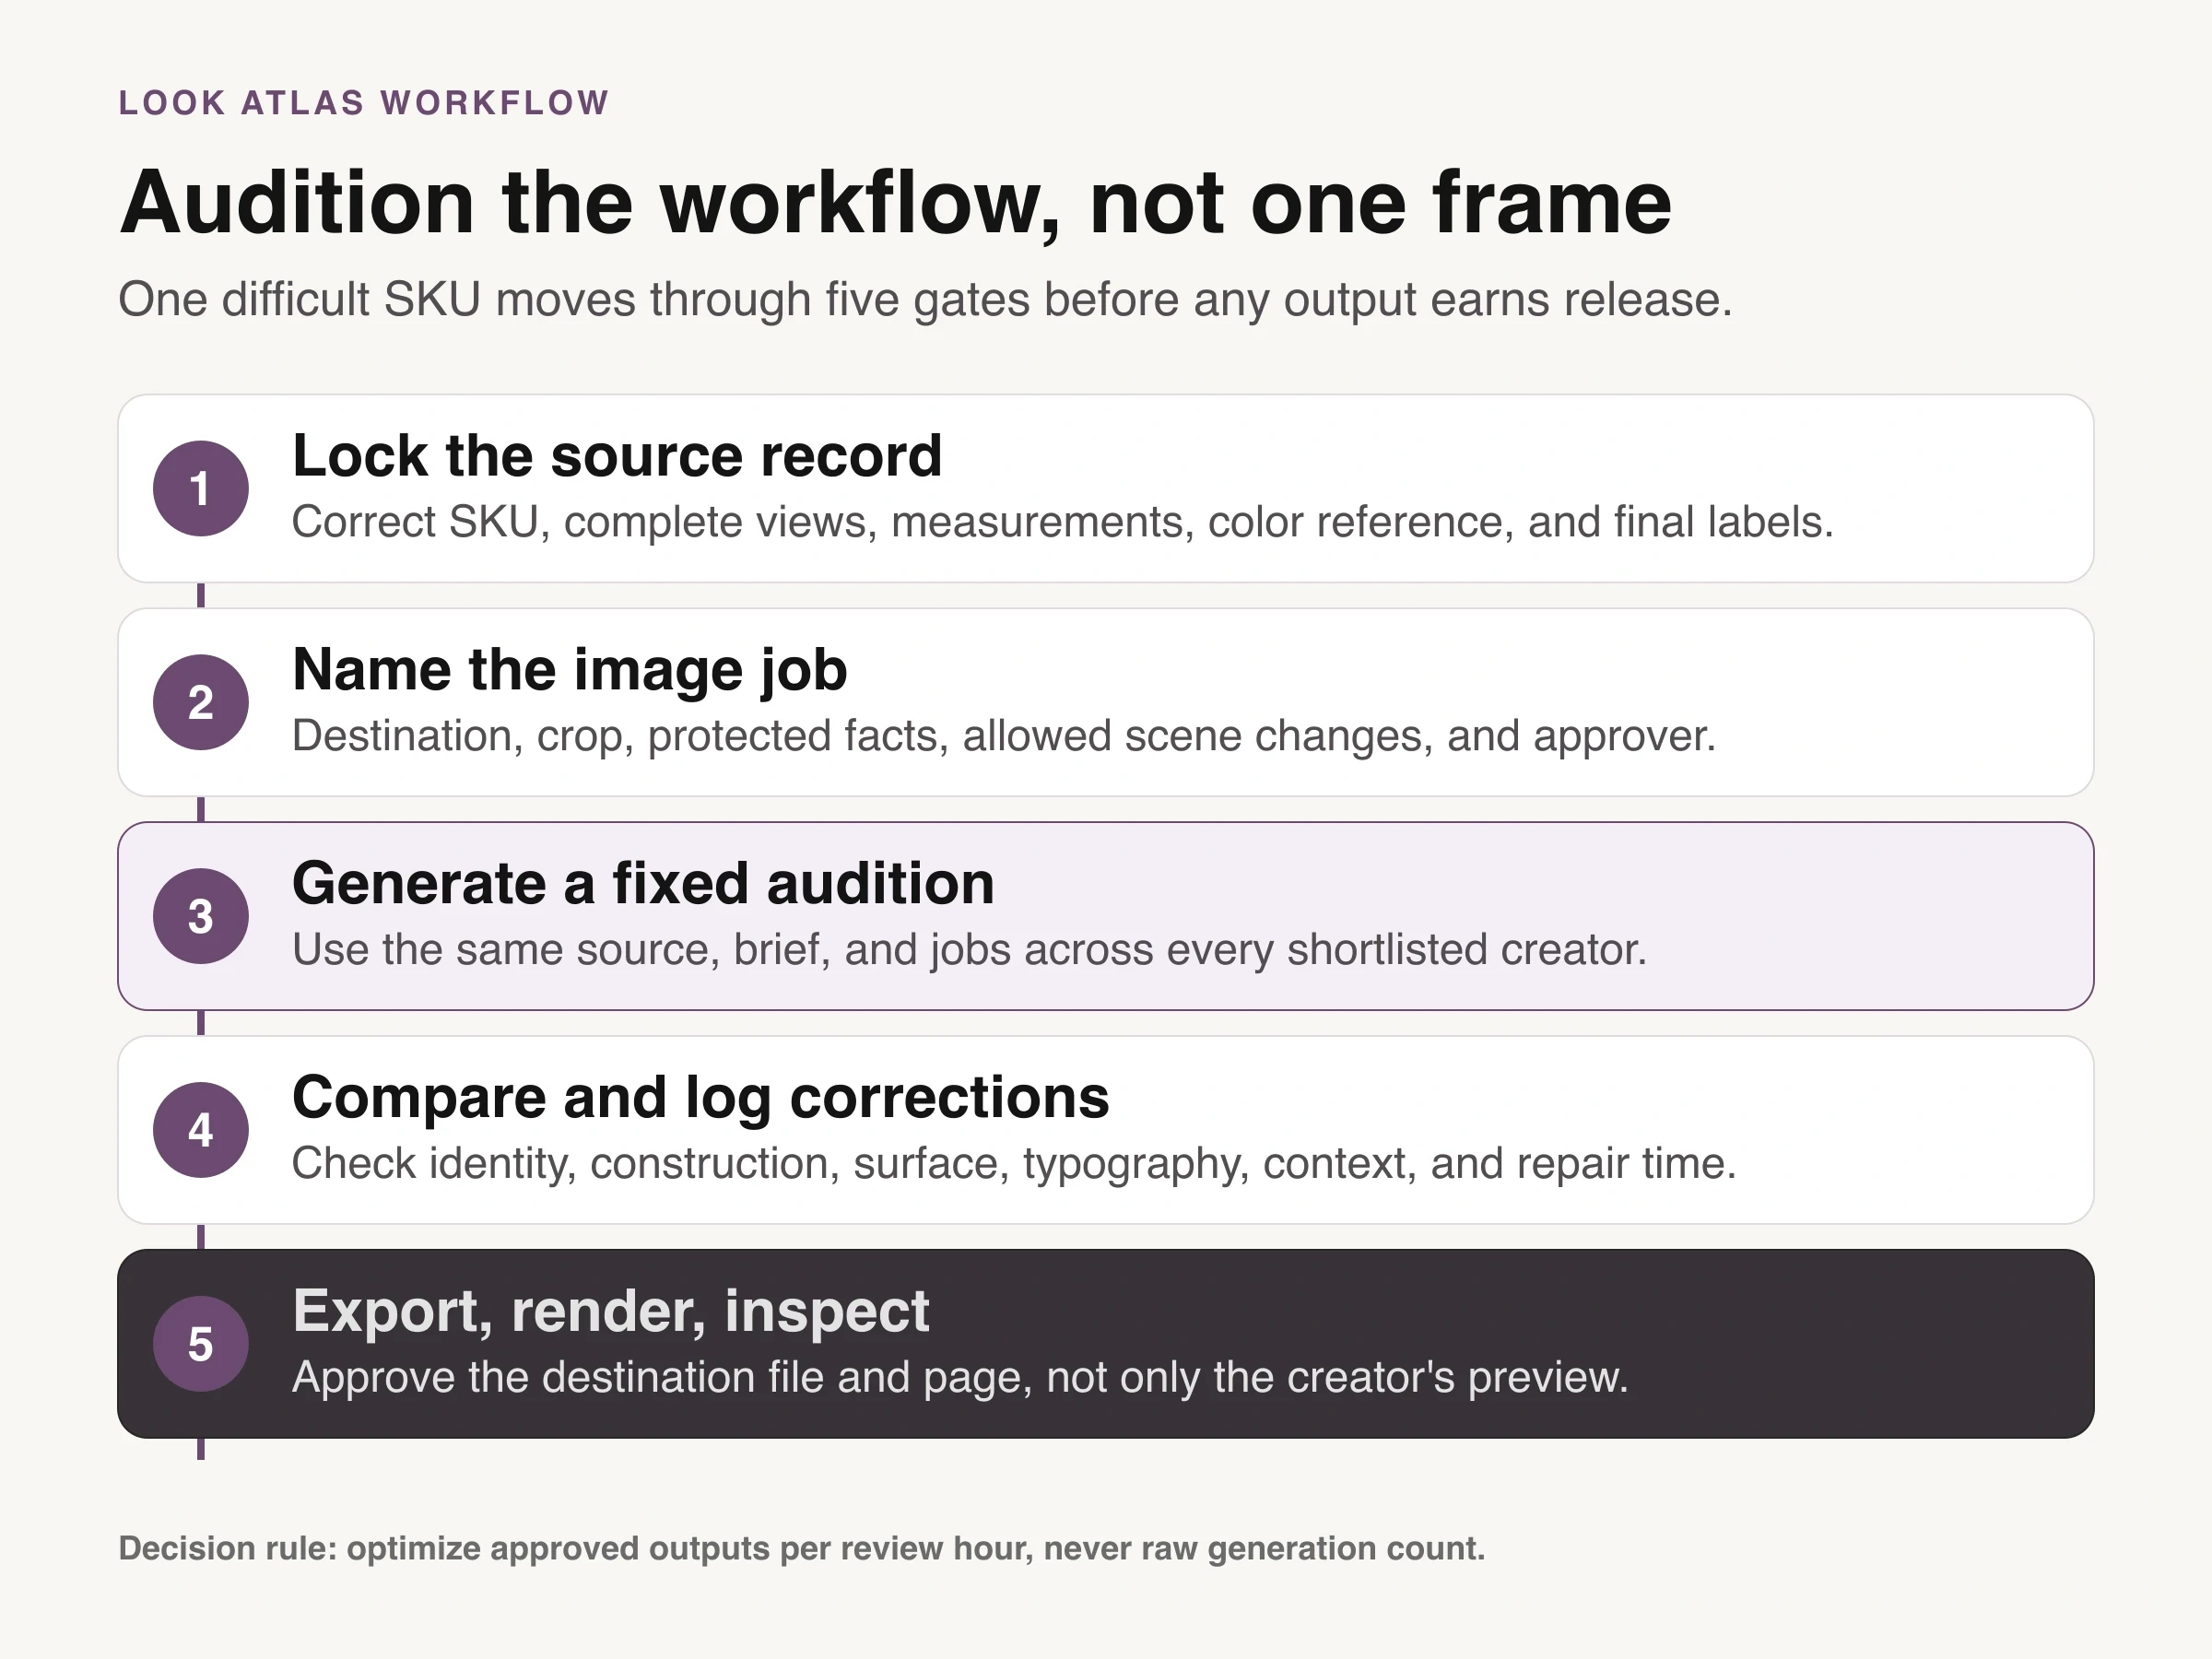
Look Atlas workflow: keep the source, image job, audition, correction log, and delivered-page check connected.
Run the sequence on one difficult SKU before a catalog batch. Choose a reflective bottle, patterned garment, fine chain, translucent package, or product with small printed copy. Easy products hide failure modes. The hardest representative item tells you whether the tool can survive real work.
Compare creators by correction load, not feature count
Build a fixed audition of six to twelve outputs across two or three image jobs. Keep the source set, prompt or scene brief, crops, and review sheet constant for every creator. That gives you comparable evidence instead of a highlight reel assembled from each tool's strongest template.
Record five numbers for the audition: outputs generated, outputs that preserve every protected fact, outputs that meet the named image job, minutes of manual correction, and approved final files. The useful denominator is approved files, not generated files. A creator that returns twenty options and one releasable image may be slower than a quieter tool that returns four and passes three.
Separate failure types while reviewing:
Identity drift: the product becomes a neighboring design, color, or variant.
Construction drift: edges, closures, straps, pumps, stones, or components change.
Surface drift: material, transparency, texture, reflections, or color become implausible.
Typography drift: label copy, logo geometry, symbols, or packaging marks deform.
Context drift: scale, grip, contact shadow, support, gravity, or use becomes impossible.
A correction log is more useful than a star rating. It tells you whether the same defect repeats, whether a tighter source set fixes it, and whether a human editor can repair it without repainting the product. If the product itself must be reconstructed after every generation, the workflow has failed even when the backgrounds are excellent.
Export for the destination, not for the creator's preview
The downloaded file is a master candidate, not proof that the image is ready for every channel. Marketplace feeds, storefront themes, ads, and social placements impose different image rules. Export from an approved master for a named destination, then inspect the delivered result.
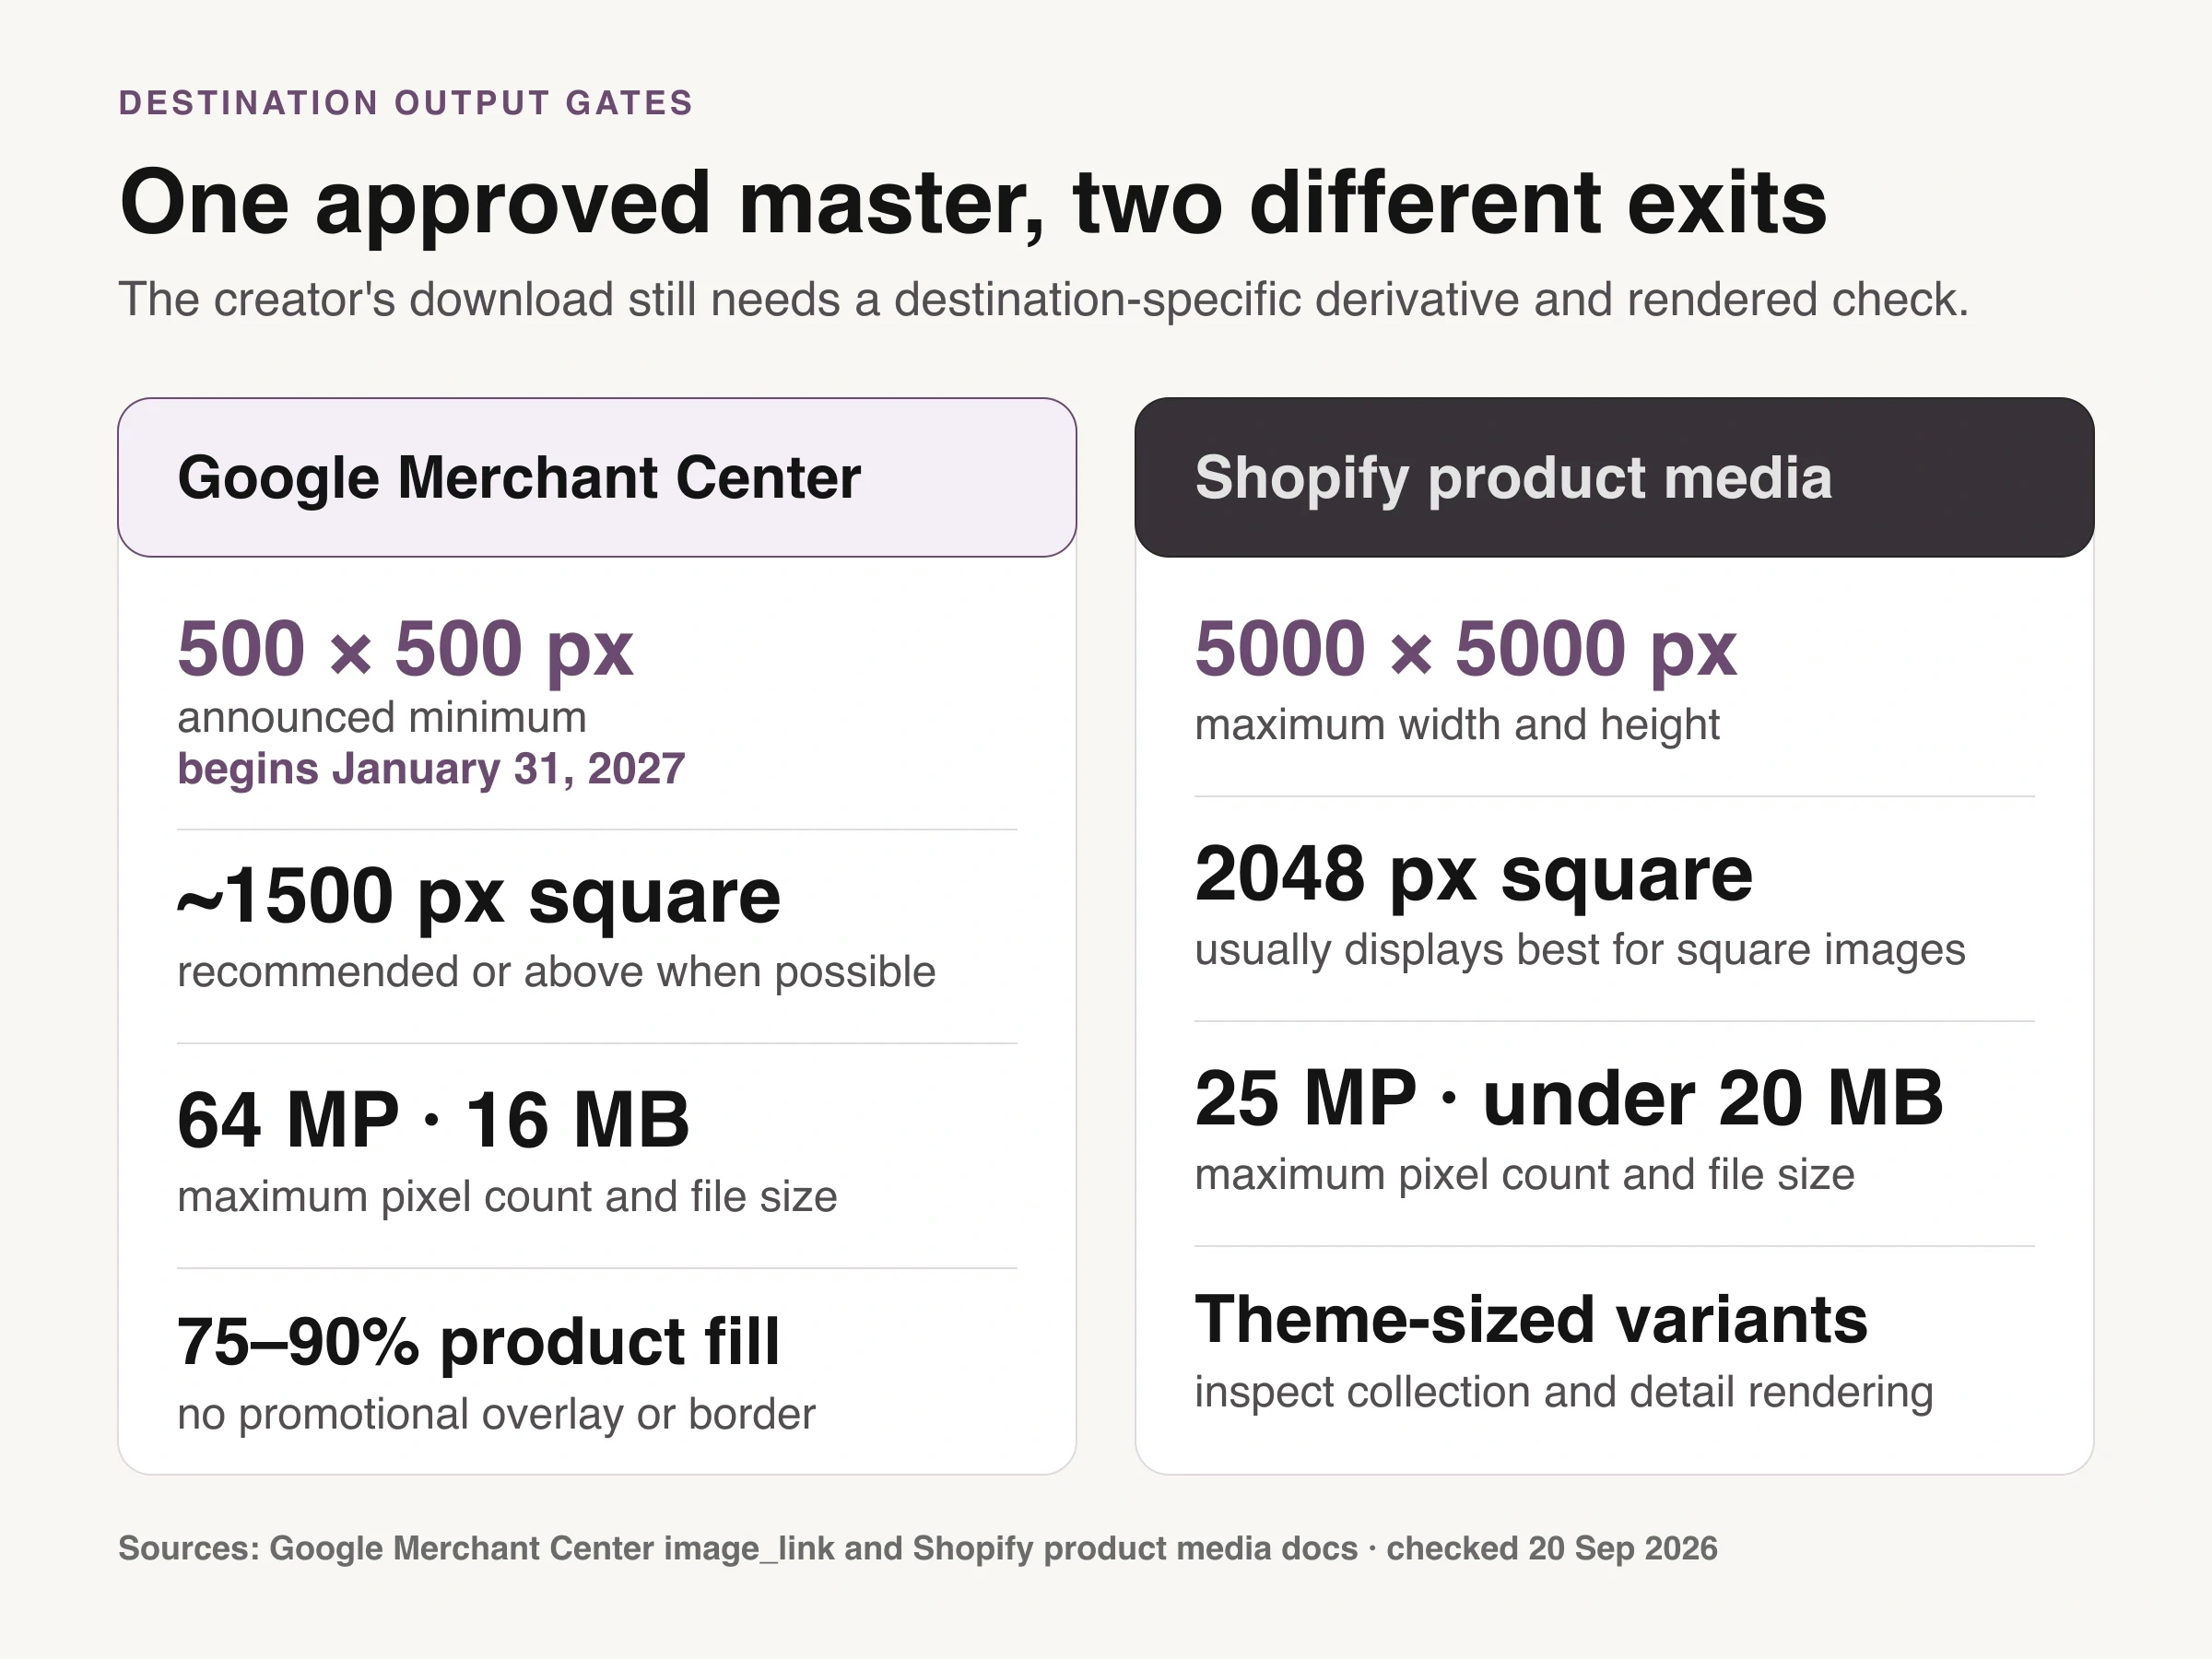
Sourced chart: Google announced that a new 500 by 500 pixel minimum begins January 31, 2027; the remaining Google guidance and Shopify constraints were checked September 20, 2026. Recheck both destinations before release.
Google announced that a new 500 by 500 pixel minimum begins January 31, 2027. The same image-link specification caps images at 64 megapixels and 16 MB, recommends around 1500 by 1500 pixels or more when possible, and disallows promotional overlays and borders in the submitted product image. Its guidance also recommends that the product occupy 75 to 90 percent of the frame. Because the announced minimum is future-dated, verify the live rule at delivery rather than treating 500 by 500 pixels as today's minimum.
Shopify's current product-media documentation accepts product and collection images up to 5000 by 5000 pixels or 25 megapixels and under 20 MB. It says 2048 by 2048 pixels usually displays best for square product images, while the storefront theme controls how the image is presented and requests multiple responsive sizes.
Those are different constraints for different systems. They are not a reason to force every image into one square preset. Keep the approved full-quality master, make destination-specific derivatives, and preserve the relationship among SKU, source set, approved output, crop, and channel file.
For Google Merchant Center, retain required metadata that identifies AI-created images. Do not strip provenance simply because a downstream optimizer can remove it. Check the current rule at delivery because platform requirements can change after a creator's export preset was built.
Review the set as a product record
An individual frame can pass while the set still fails. Put the outputs beside the factual source and compare them as one sequence. The product should not change height, color, label position, hardware, material, or included parts as the background becomes more expressive.
Review at the size the customer will see. A label that survives at full resolution may become unreadable or falsely sharp in a small card. A bracelet clasp can disappear in a mobile crop. A white product exported with transparency can lose its edge on an unexpected dark background. Shopify creates multiple image sizes for different page contexts, so inspect the rendered collection card and product detail view rather than approving only the uploaded master.
Keep the generated master, prompt or scene brief, source-set identifier, review result, and final derivatives together. This record makes a later repair possible. It also prevents an attractive rejected frame from reappearing in a campaign folder without its failed product check.
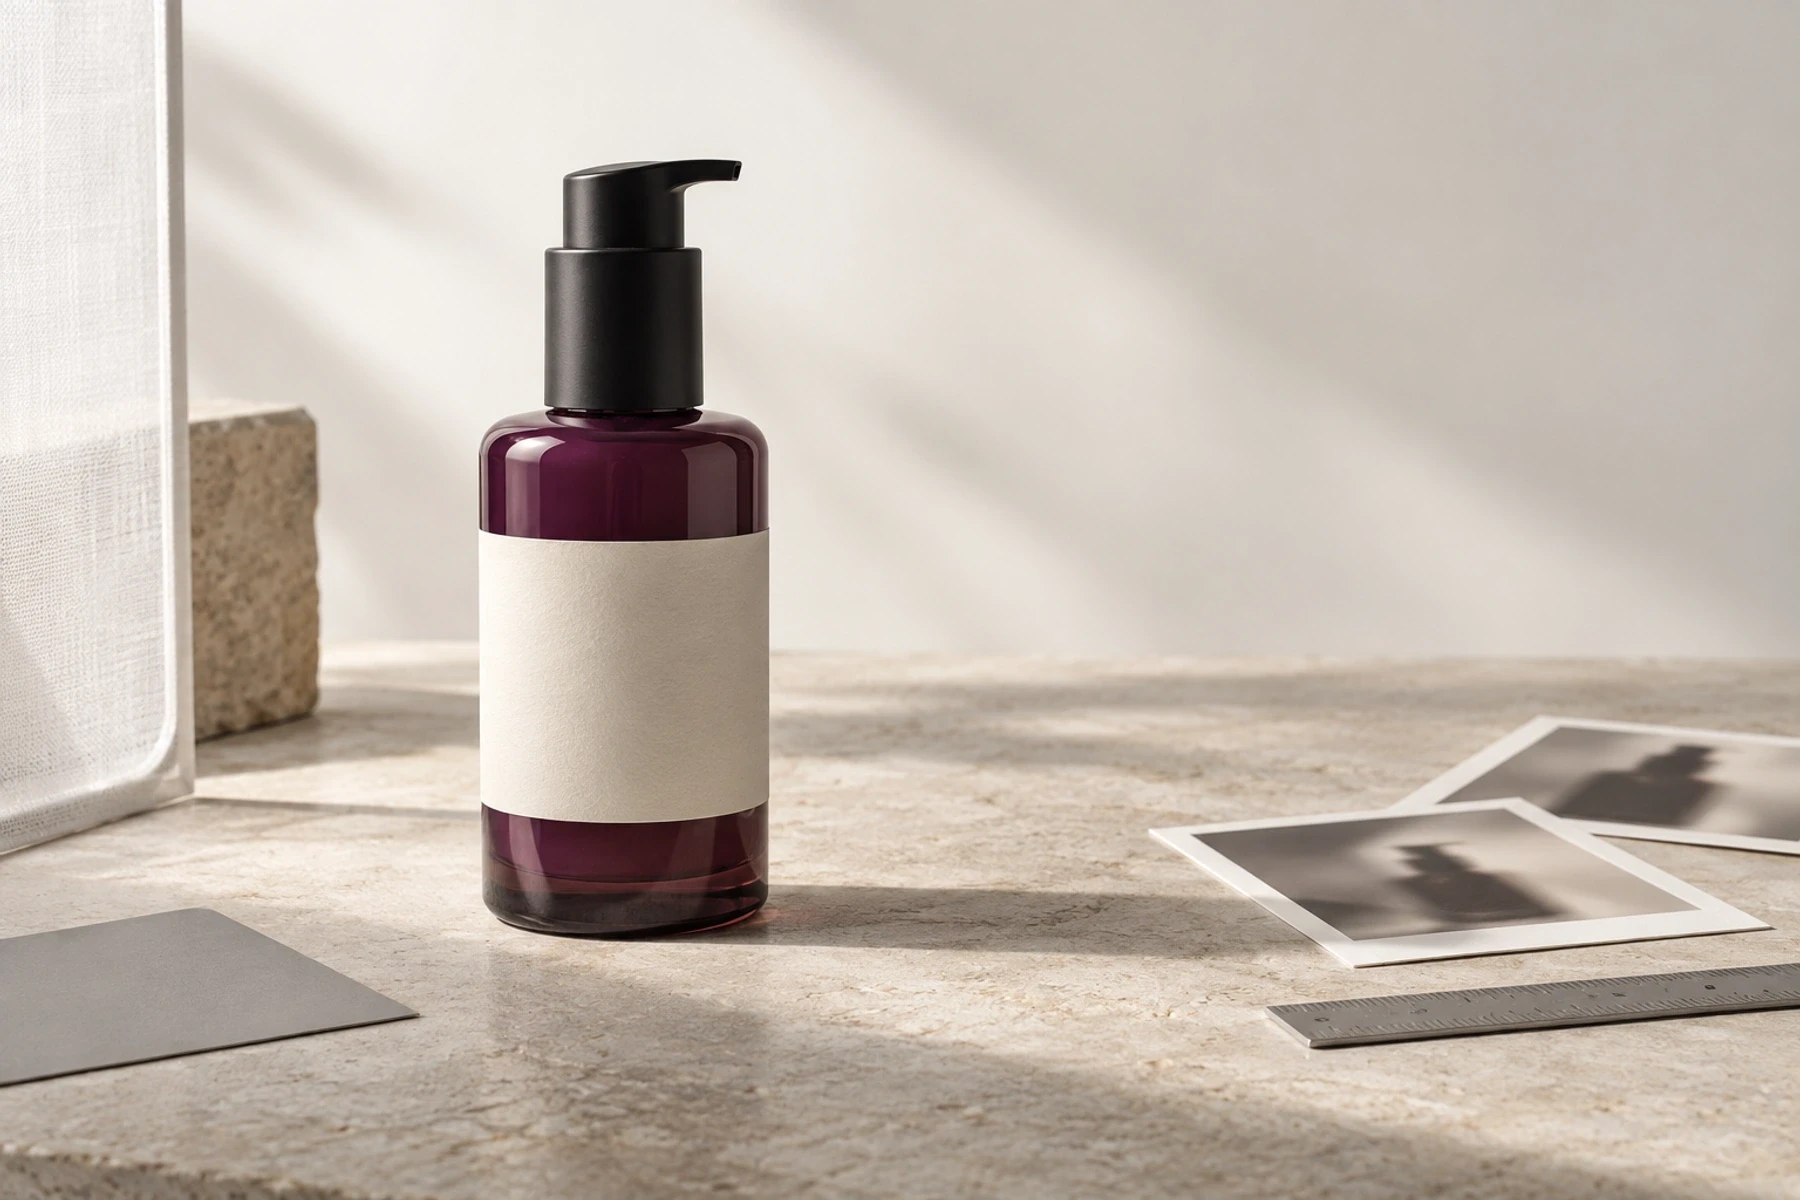
Approval should name the evidence. “Matches source bottle front, side, pump, cream label boundary, plum glass, and measured height; background and shadow may change” gives the next reviewer something to verify. “Looks good” leaves the product open to reinterpretation.

Conceptual illustration: a fictional product review scene, not a real SKU, creator test, customer asset, or proof of product fidelity.
Use Look Atlas after the source and release sheet are ready
Look Atlas is relevant when an ecommerce team has approved product imagery and wants to create additional studio, lifestyle, campaign-style, or product-on-model visuals. The safe handoff is the same one used for any creator: a factual source set, one image job, the target crop, allowed scene changes, and protected product facts.
Treat every generated frame as proposed creative until it passes review. Look Atlas is not a substitute for missing product evidence, and this guide does not promise perfect fidelity or a commercial result. Preserve at least one factual product view for the destinations that require it, then use generated context where it helps answer scale, use, styling, or campaign needs.
Use the AI product photography guide when the main question is how source images, prompts, and review fit together. If the required job is specifically apparel on a person, use the AI fashion photography workflow to define that lane instead of pretending a general still-life audition covers fit, drape, pose, and garment behavior.
If the creator is being considered for catalog scale, run the hard-SKU audition before connecting it to a bulk workflow. Approve the instructions, review sheet, and export presets first. Automation should multiply a known process, not make a hidden defect arrive faster.
Make the buying decision with twelve frames
Choose one difficult product and three real image jobs. Ask each shortlisted creator for four variations per job. Review the twelve frames against the same product-truth sheet, record correction time and approved outputs, then test the winners in their actual destinations.
Buy the workflow that produces the highest share of truthful, job-ready images with a correction load your team can sustain. That decision may favor different tools for factual cleanup, on-model work, lifestyle context, or campaign variation. One creator does not need to win every lane.
The final test is simple: another teammate should be able to trace every released image back to the correct SKU, approved source, declared change budget, review decision, and destination. If that chain breaks, the output is still a draft, however polished it looks.
