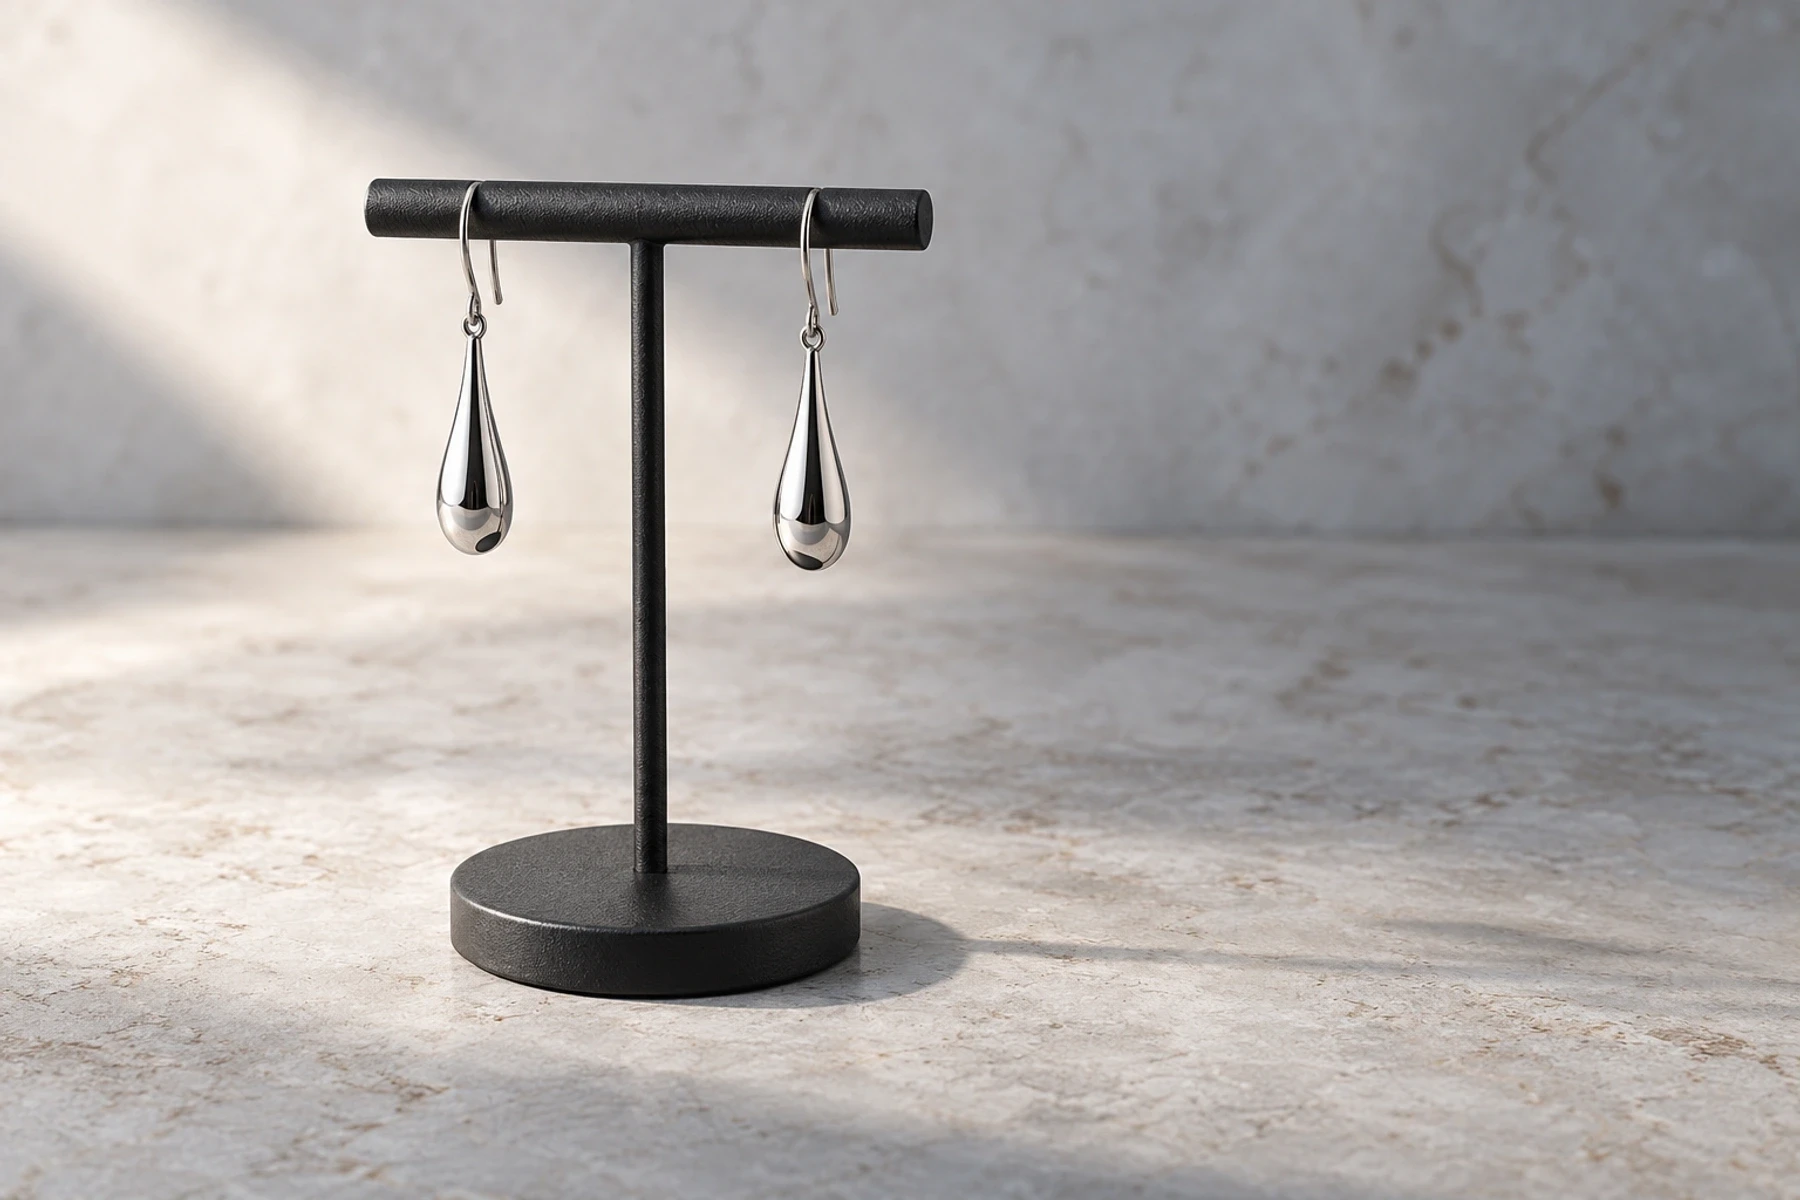
Earring display for photography: choose a support that shows the piece
A stud needs somewhere for its post to go. A long drop needs room to hang. A hoop needs an angle that reveals its curve rather than turning it into a thin line. Choose an earring display for photography around those mechanics before choosing a color or decorative shape.
For a straightforward product photograph, start with a pierced card for studs or an open stand for hanging earrings, then check the actual fastening and camera view. Neither is universal. The useful support holds the real piece without changing its hang, obscuring its outline, or pretending to show how it fits an ear.
Match the support to the fastening
Look at the part that would pass through the ear, not just the ornament. A hole, notch and bare crossbar give that fastening different places to sit. Check the real pair against the support before mounting a batch.
Earring construction | Support decision |
|---|---|
Straight post with a separate back | Try a pierced matte card. The post must pass through without bending, with room behind for the back. Photograph the mechanism separately if the card hides it. |
Open hook with a hanging drop | Try a narrow crossbar or suitable hole. Check that the hook seats securely and that the ornament hangs freely below it. |
Closed hoop or hinged hoop | Check how it opens and where it can rest. A thick bar can prevent closure or turn the hoop away from the intended view. Do not force it to fit. |
Threader or flexible chain | Use a support that allows the intended hanging lengths without pulling the chain into a different shape. Keep a separate view for the complete construction. |
Look Atlas mounting analysis: verify each actual fastening and support; this is not a tested compatibility list.
A retail card can be the right mount and the wrong background. Its logo, price sticker or pattern may compete with a small stud. An unprinted card is often the simpler photographic choice; retain a packaging photograph separately when packaging is part of the offer.
For a low-cost setup, fold clean card into a stable tent and make appropriately positioned holes before inserting the earrings. Test the empty support first. If it tips when the pair is mounted, use a wider stable support rather than treating the jewelry as a counterweight. This is a practical starting method, not a load-tested stand design.
Measure from the mounting point, not the top of the stand
The clearance that matters is the distance from the actual mounting point to the first surface below the hanging earring. That surface might be the base, a raised plinth or a curved part of the stand. Overall stand height does not tell you this distance by itself.
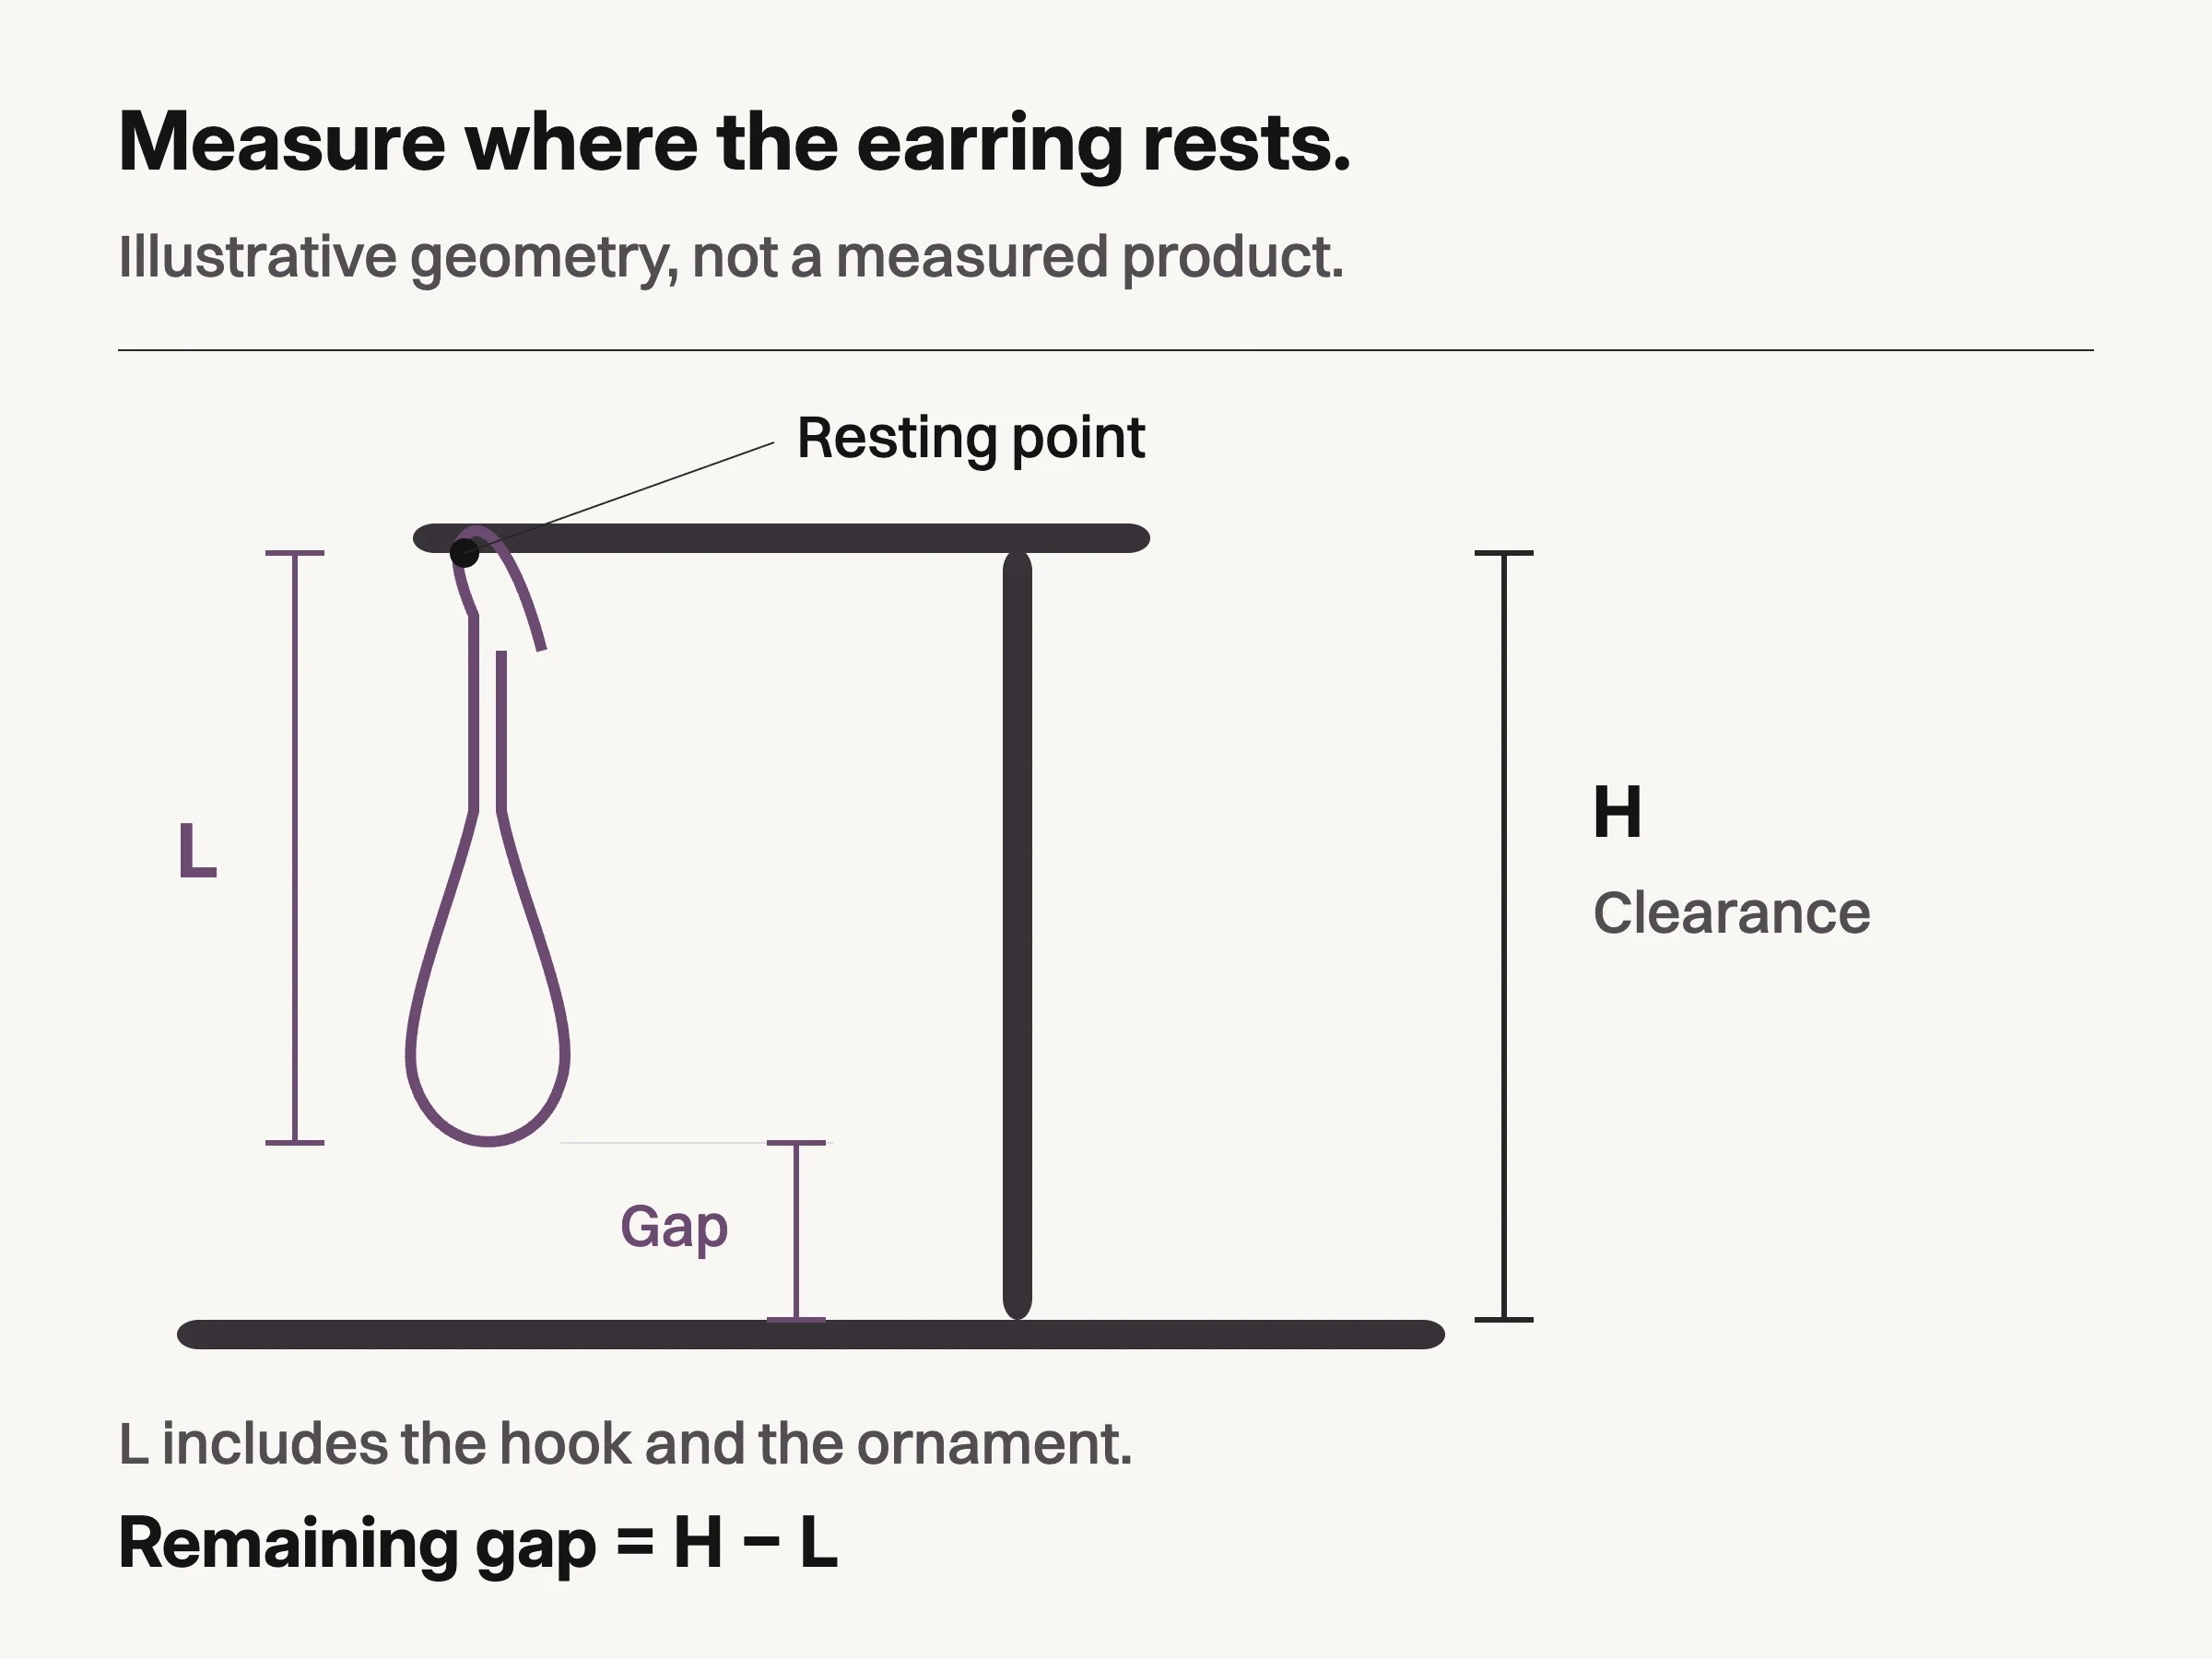
Illustrative geometry, not a measured product: clearance and hanging length share the actual resting point. Remaining gap is H minus L; no universal margin is established.
Measure the earring in the position it will occupy. For a hook, use the place where the hook rests on the support as the starting point; measuring only the decorative drop leaves out part of the assembly. Compare that length with the mount-to-surface clearance. The remaining gap must be assessed on the actual set, including movement and the intended camera angle.
For example, suppose a fictional drop hangs 65 mm below its resting point and the measured clearance is 70 mm. The arithmetic leaves 5 mm beneath it. That is not a recommended safety margin or a claim that it will photograph well. The base may still appear behind the drop, or the earring may touch it when it swings. Change the support or composition if the real piece cannot hang freely.
Pair spacing needs the same care. Measure between the mounting positions, not between the outer ends of the bar. Two wide ornaments can overlap even on a broad stand if the holes sit close together. Do not spread the hooks or reshape the earrings to manufacture a cleaner gap.
Use stand specifications to narrow the choice, not certify the fit
Manufacturer dimensions are useful when they describe the measurement you need. Oakleaf's Imelda stand lists a height of 80 mm; its Celia stand lists 100 mm. Both pages offer top-bar variants with different widths and hole arrangements.
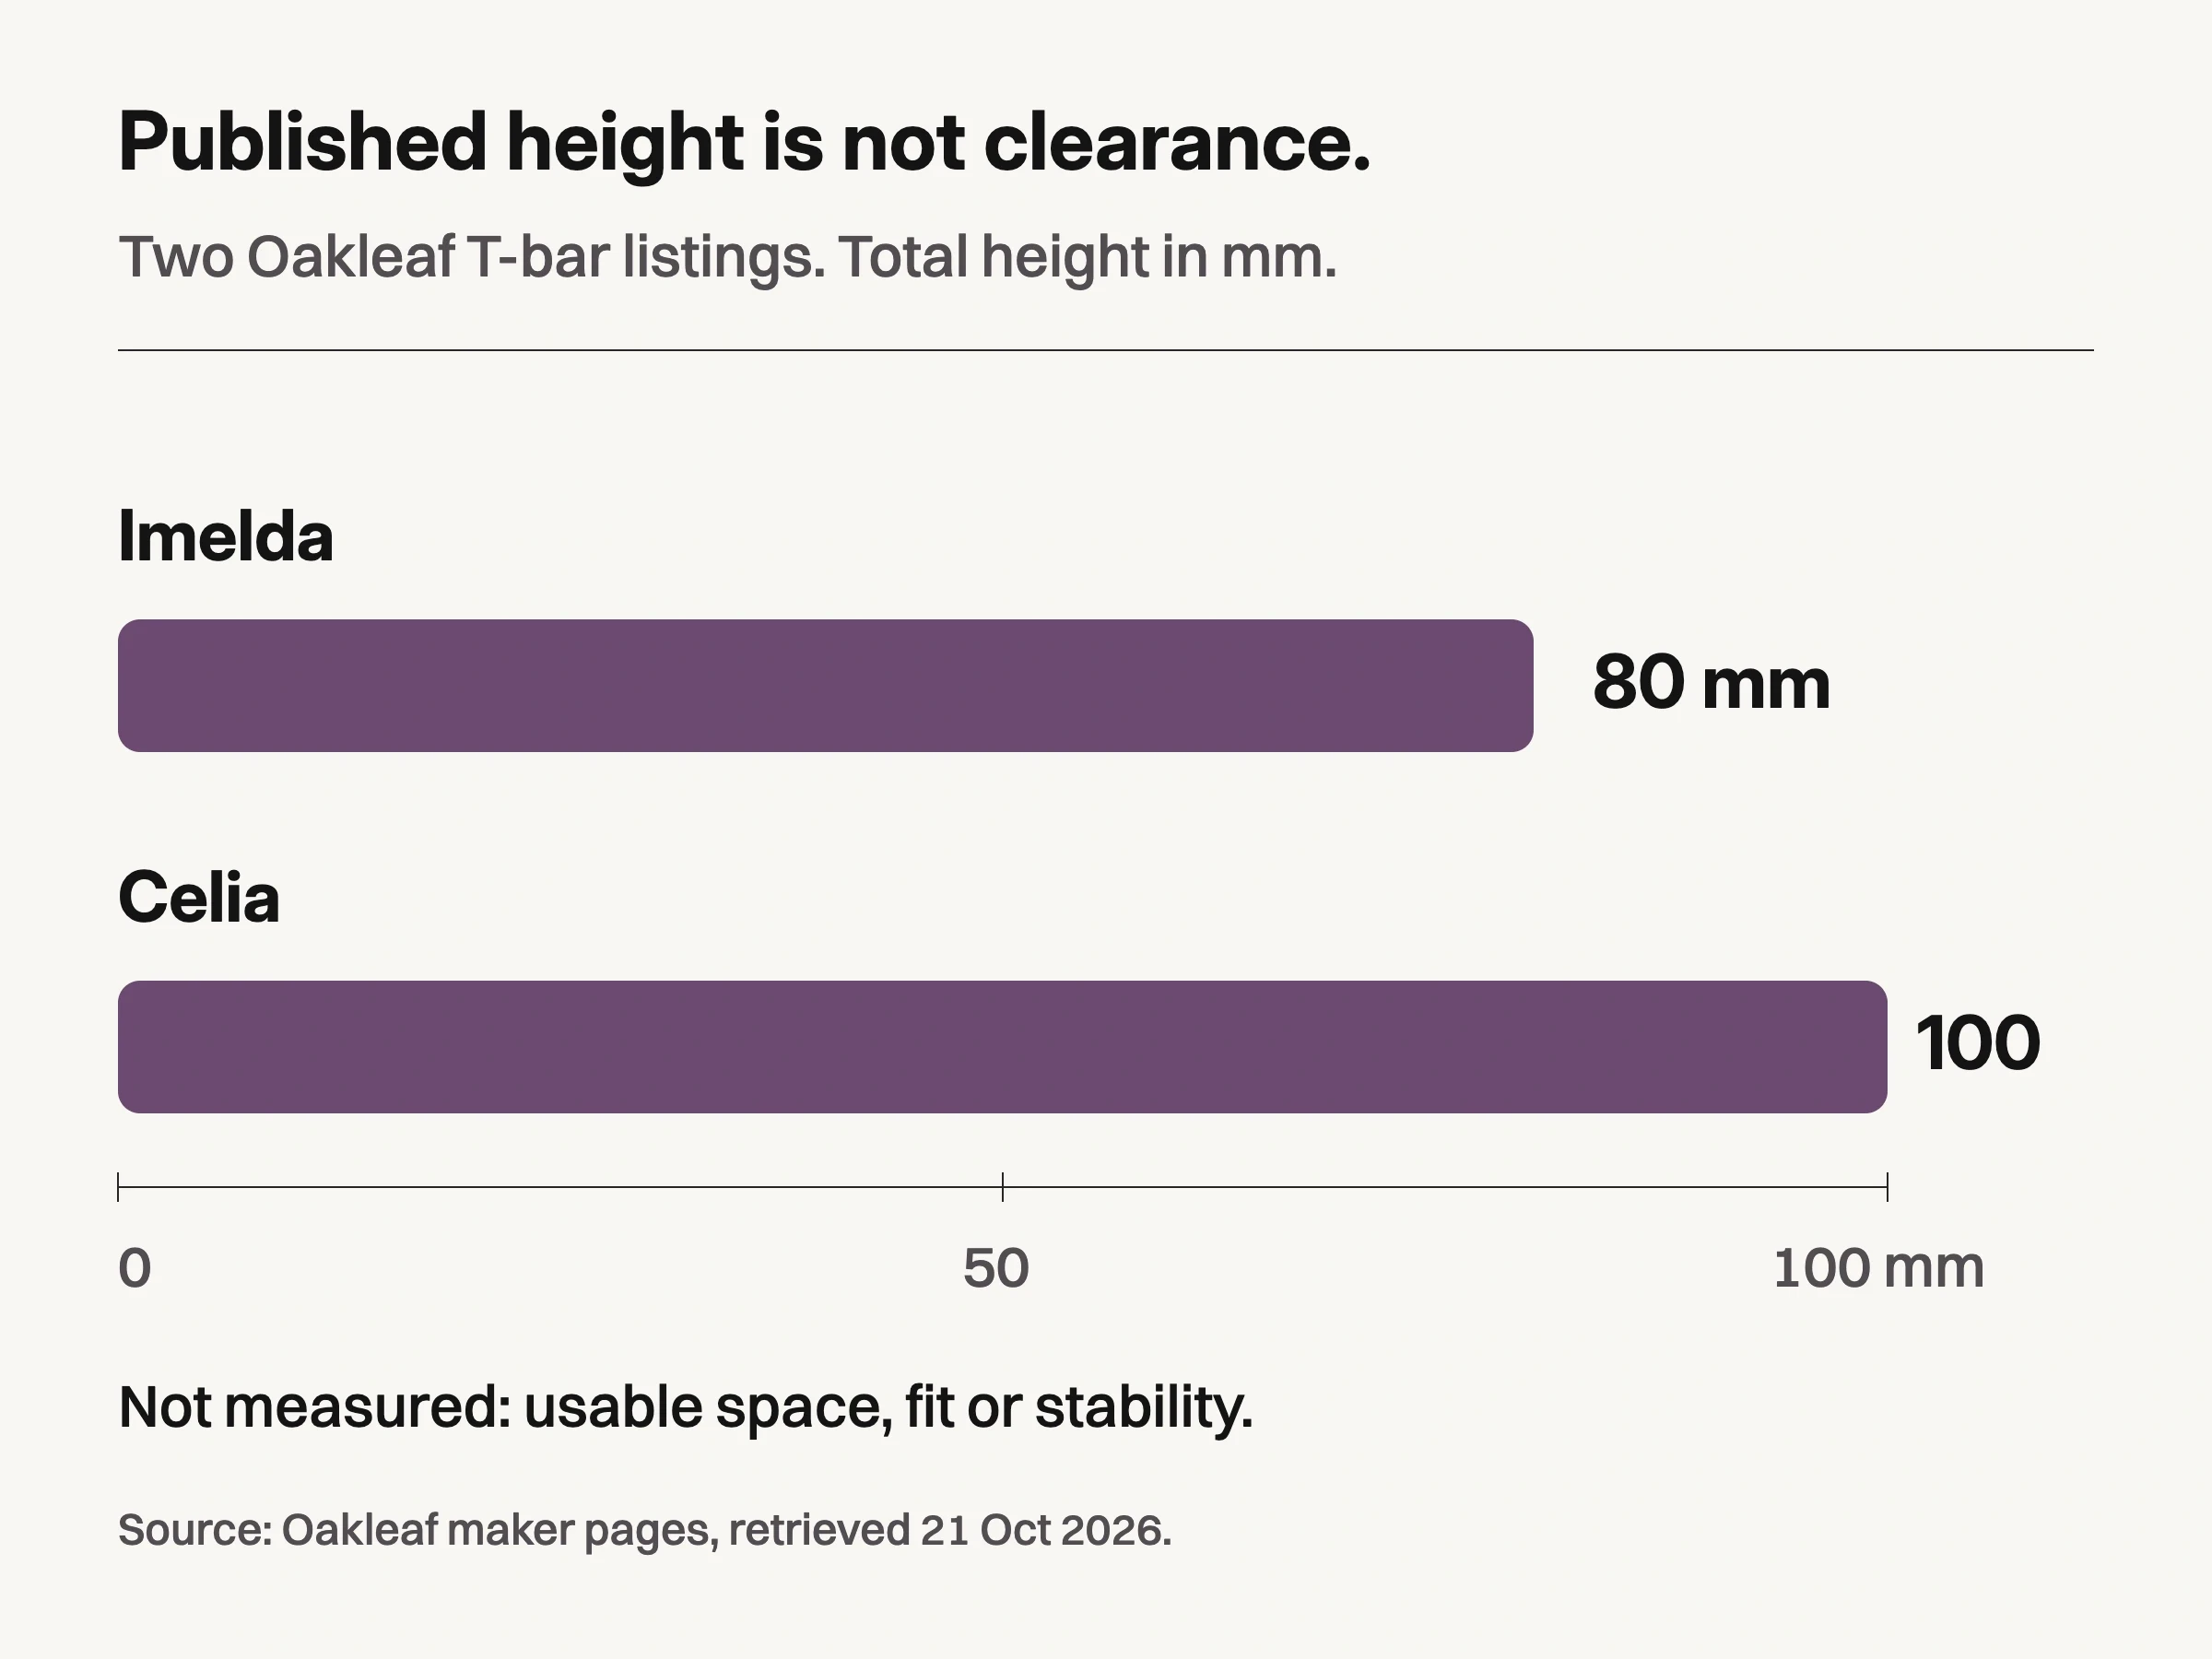
Source: Oakleaf Imelda and Celia maker specifications, retrieved 21 October 2026. Bars show published total height only, not measured hanging clearance, product fit, photographic quality or stability. No physical sample was tested.
The chart establishes a difference in published total height, not a difference in usable hanging space. Neither number certifies the fit of the hypothetical 65 mm drop. Before buying, ask for the mount-to-base measurement, the hole positions and the opening or bar thickness relevant to your fastening. Ask which variant those measurements describe.
There is no need to buy an ornate stand just because it is sold as a photography prop. A flat card gives a small stud a clean field but conceals the post behind it. An open T-bar leaves space around a drop but introduces a visible horizontal line and upright. Choose the compromise you can actually photograph, rather than assuming the support will disappear in editing.
Turn the mounted pair before changing the light
Start near the intended front view and let the earrings settle. Then turn the support slightly while watching the captured image or live view. A drop that faces forward on one hook can rotate sideways on another; a hoop's circular opening can almost vanish when seen edge-on.
Adjust the mounting position or camera angle before adding more light. Keep any deliberate left/right difference in an asymmetric pair. If one earring is partly hidden, move the pair or make another view instead of duplicating the more convenient earring in post-production.
For the fastening view, remove or turn the support as needed to expose the actual post, back, hinge or hook. A front photograph through a card does not establish what is behind it. Likewise, a rigid ear-shaped display is a prop, not evidence of the piece's weight, comfort or fit on a person.
When scale matters, record the physical dimensions separately. A ruler photographed in the same plane can provide a visible reference, but a stand of unstated size cannot. Do not ask a generated ear or an arbitrary display head to substantiate a real product's dimensions. For broader capture planning beyond the mount, the jewelry professional photography guide covers the wider production brief.
Make the support less visible without changing the earrings
Choose the support finish through the camera, with the jewelry mounted. Pale card can give a dark outline room; a dark support can separate a light piece but merge with dark details. Clear acrylic still has edges and can record reflections. “Clear” is not the same as absent.
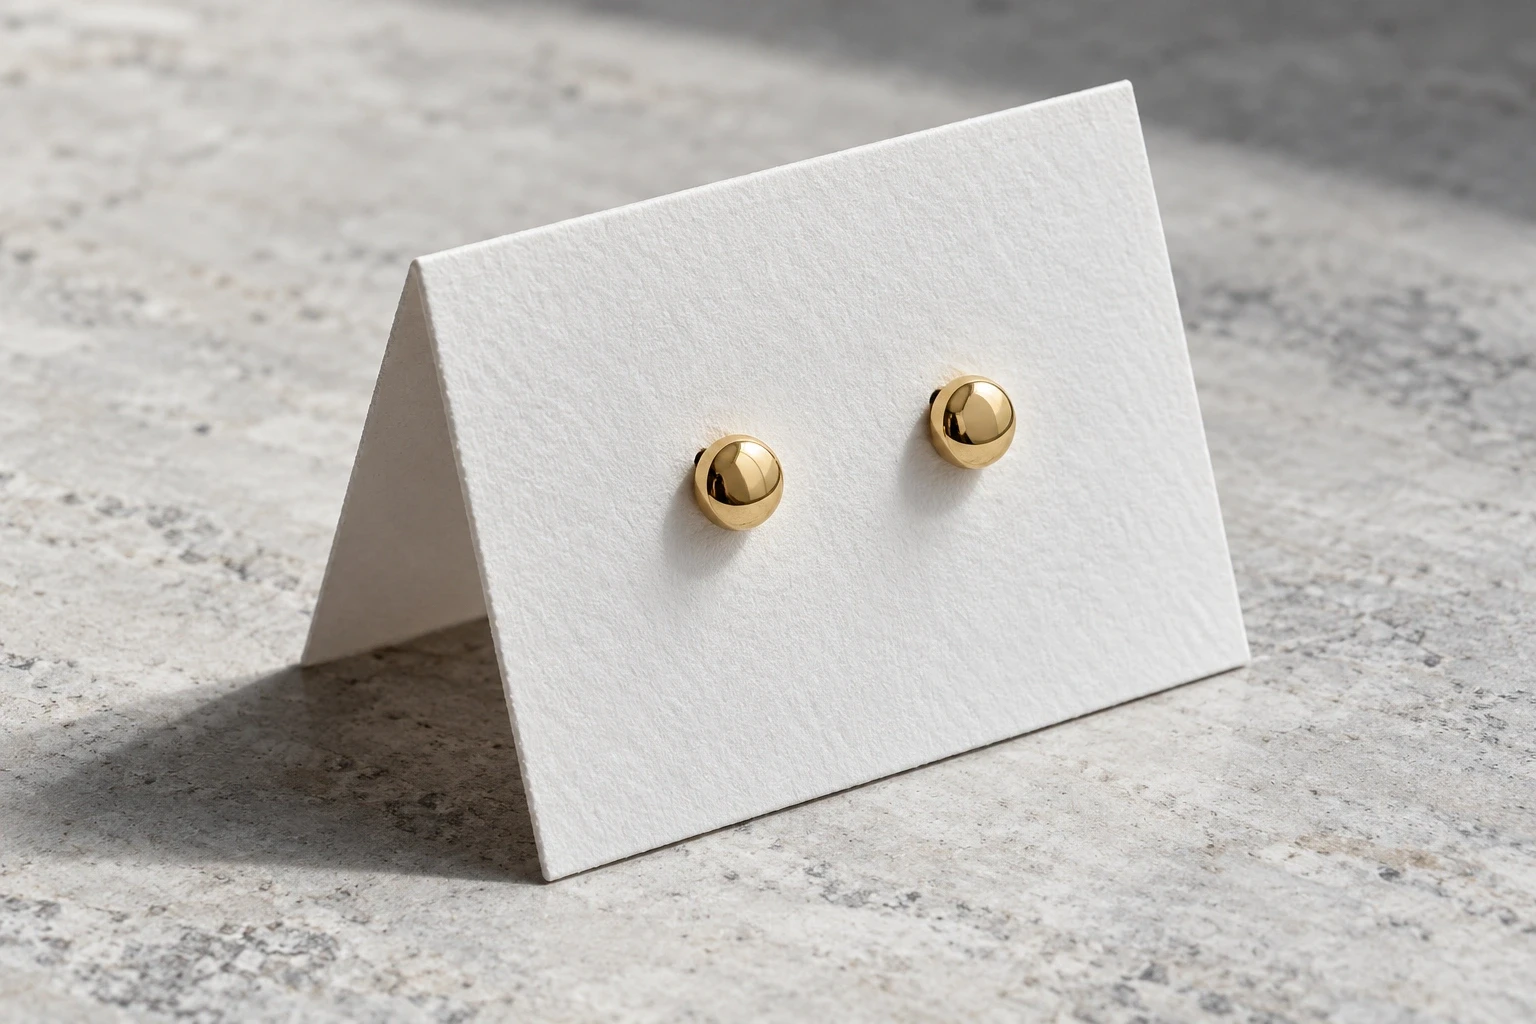
Conceptual illustration: fictional gold studs on folded matte card. The image illustrates a simple support and visible front faces, not a real SKU, a compatibility test or evidence of hidden fastening details.
Keep the treatment restrained. GIA's gem and jewelry photography guidance explains how diffusion can soften shadows and create tonal gradients on polished metal. It also recommends avoiding mixed color temperatures. Those principles help you judge whether a bright line belongs to the earring or the nearby support; they do not validate a particular stand.
If reflections are the remaining problem, the jewelry photo box setup guide addresses the enclosure and cards. For source and modifier choices, use the lights for jewelry photography guide. Finish the mounting decision first so that lighting changes are not compensating for a hidden fastening or an awkward hang.
Retouching can remove a support only where the real product boundary is known. If the stand covers a hook or chain segment, another photograph is a better factual source than an invented continuation. Keep an untouched reference with the supported piece visible.
Once those factual views exist, Look Atlas for jewelry imagery can be used for generated studio, lifestyle and campaign-style product imagery. Treat that as a separate creative role. Check proposed outputs against the real photographs; generated context does not establish earring scale, physical fit, material identity or fastening detail.
Before dismantling the set, save one wider photograph showing where the hooks or posts sit, plus the measured clearance and mounting spacing. Someone repeating the photograph should be able to place the same pair without guessing. If the display makes that difficult, change the display, not the earrings.
