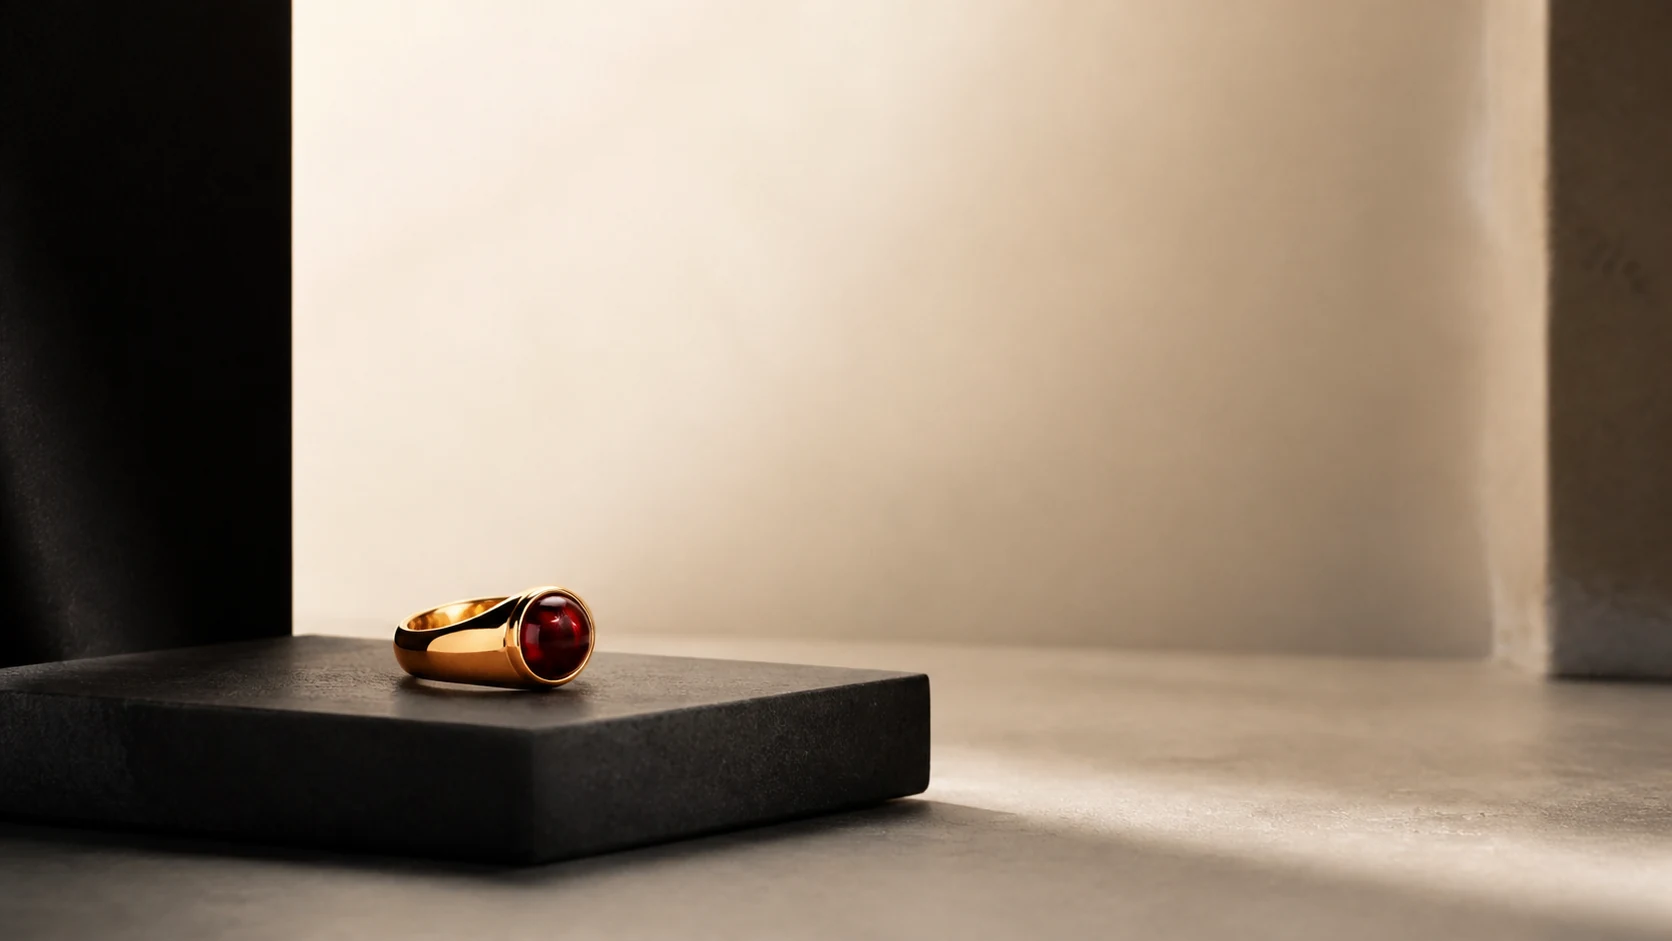
Lights for Jewelry Photography: Choose the Source, Shape the Reflection
The best first light for jewelry photography is not the brightest kit or the one with the most heads. Start with one color-consistent continuous LED or off-camera flash, then make it appear large to the jewelry with a softbox or diffusion screen. Add a second light only when it has a named job, such as a controlled gemstone accent or a separate background.
Choose continuous light when you need phone capture, video, or an immediate view of every reflection. Choose flash when the work is still-only and you need more output at a small aperture or want to suppress room light. In both cases, the modifier, working distance, and reflection shape matter more than the logo on the lamp.
Jewelry records the luminous surfaces around it. It does not know the wattage printed on the box. A buying decision therefore has to answer two questions: can the source produce the reflection you need, and can it do so with repeatable color and exposure?
Choose the light by the job, not the kit
If the job is | Start with |
|---|---|
Repeatable catalog stills on a tripod | One flash head or continuous LED behind a large rectangular modifier |
Phone stills, video, or live composition | One dimmable continuous LED behind diffusion |
Still and video from the same small set | Continuous as the base; add flash only for a defined still-image need |
A truthful base plus selected gemstone sparkle | One broad diffused source, then one small directional accent |
Start with one controllable source. Add another only when it has a named job.
This is a starting choice, not a ranking of technologies. A stationary ring on a tripod does not need flash to freeze motion. A flash can still be useful when diffusion absorbs a great deal of output or when the aperture must be closed for depth. Continuous light makes small changes easier to see, but a poor LED can introduce banding or color variation. Test the real capture path before buying several matching units.
Avoid a bundle whose main claim is the number of lights. Two weak sources with fixed modifiers can be less controllable than one source that accepts a large softbox, grid, reflector, or independent diffusion frame. A ring light is also a shape, not a universal shortcut. Its centered circle may suit flat documentation, but it can place a circular reflection directly in polished metal or glass.
Judge four controls before you buy
First, judge output at the subject after the chosen modifier, not bare-lamp wattage. Diffusion, distance, aperture, ISO, shutter speed, and the size of the set all change the usable exposure. Ask a seller for output measured at a stated distance and setting, then reproduce that distance with the modifier you intend to use.
Second, check whether white balance stays credible through the dimming range you will actually use. The Gemological Institute of America advises using a single color temperature rather than mixing fluorescent, incandescent, and daylight sources. That does not mean every lamp labeled daylight matches another. Photograph a neutral reference and the real metal and stone at low, middle, and high output.
Do not treat one CRI number as a guarantee. The CIE now recommends reporting its newer Rf fidelity metric alongside Ra during the industry's transition.
Third, test flicker. Sony's current flicker explanation documents that some LED lighting can create brightness bands or color changes because its output cycles while a focal-plane shutter scans the frame. Make stills across the shutter speeds you use, then record short phone and camera clips at the intended frame rates.
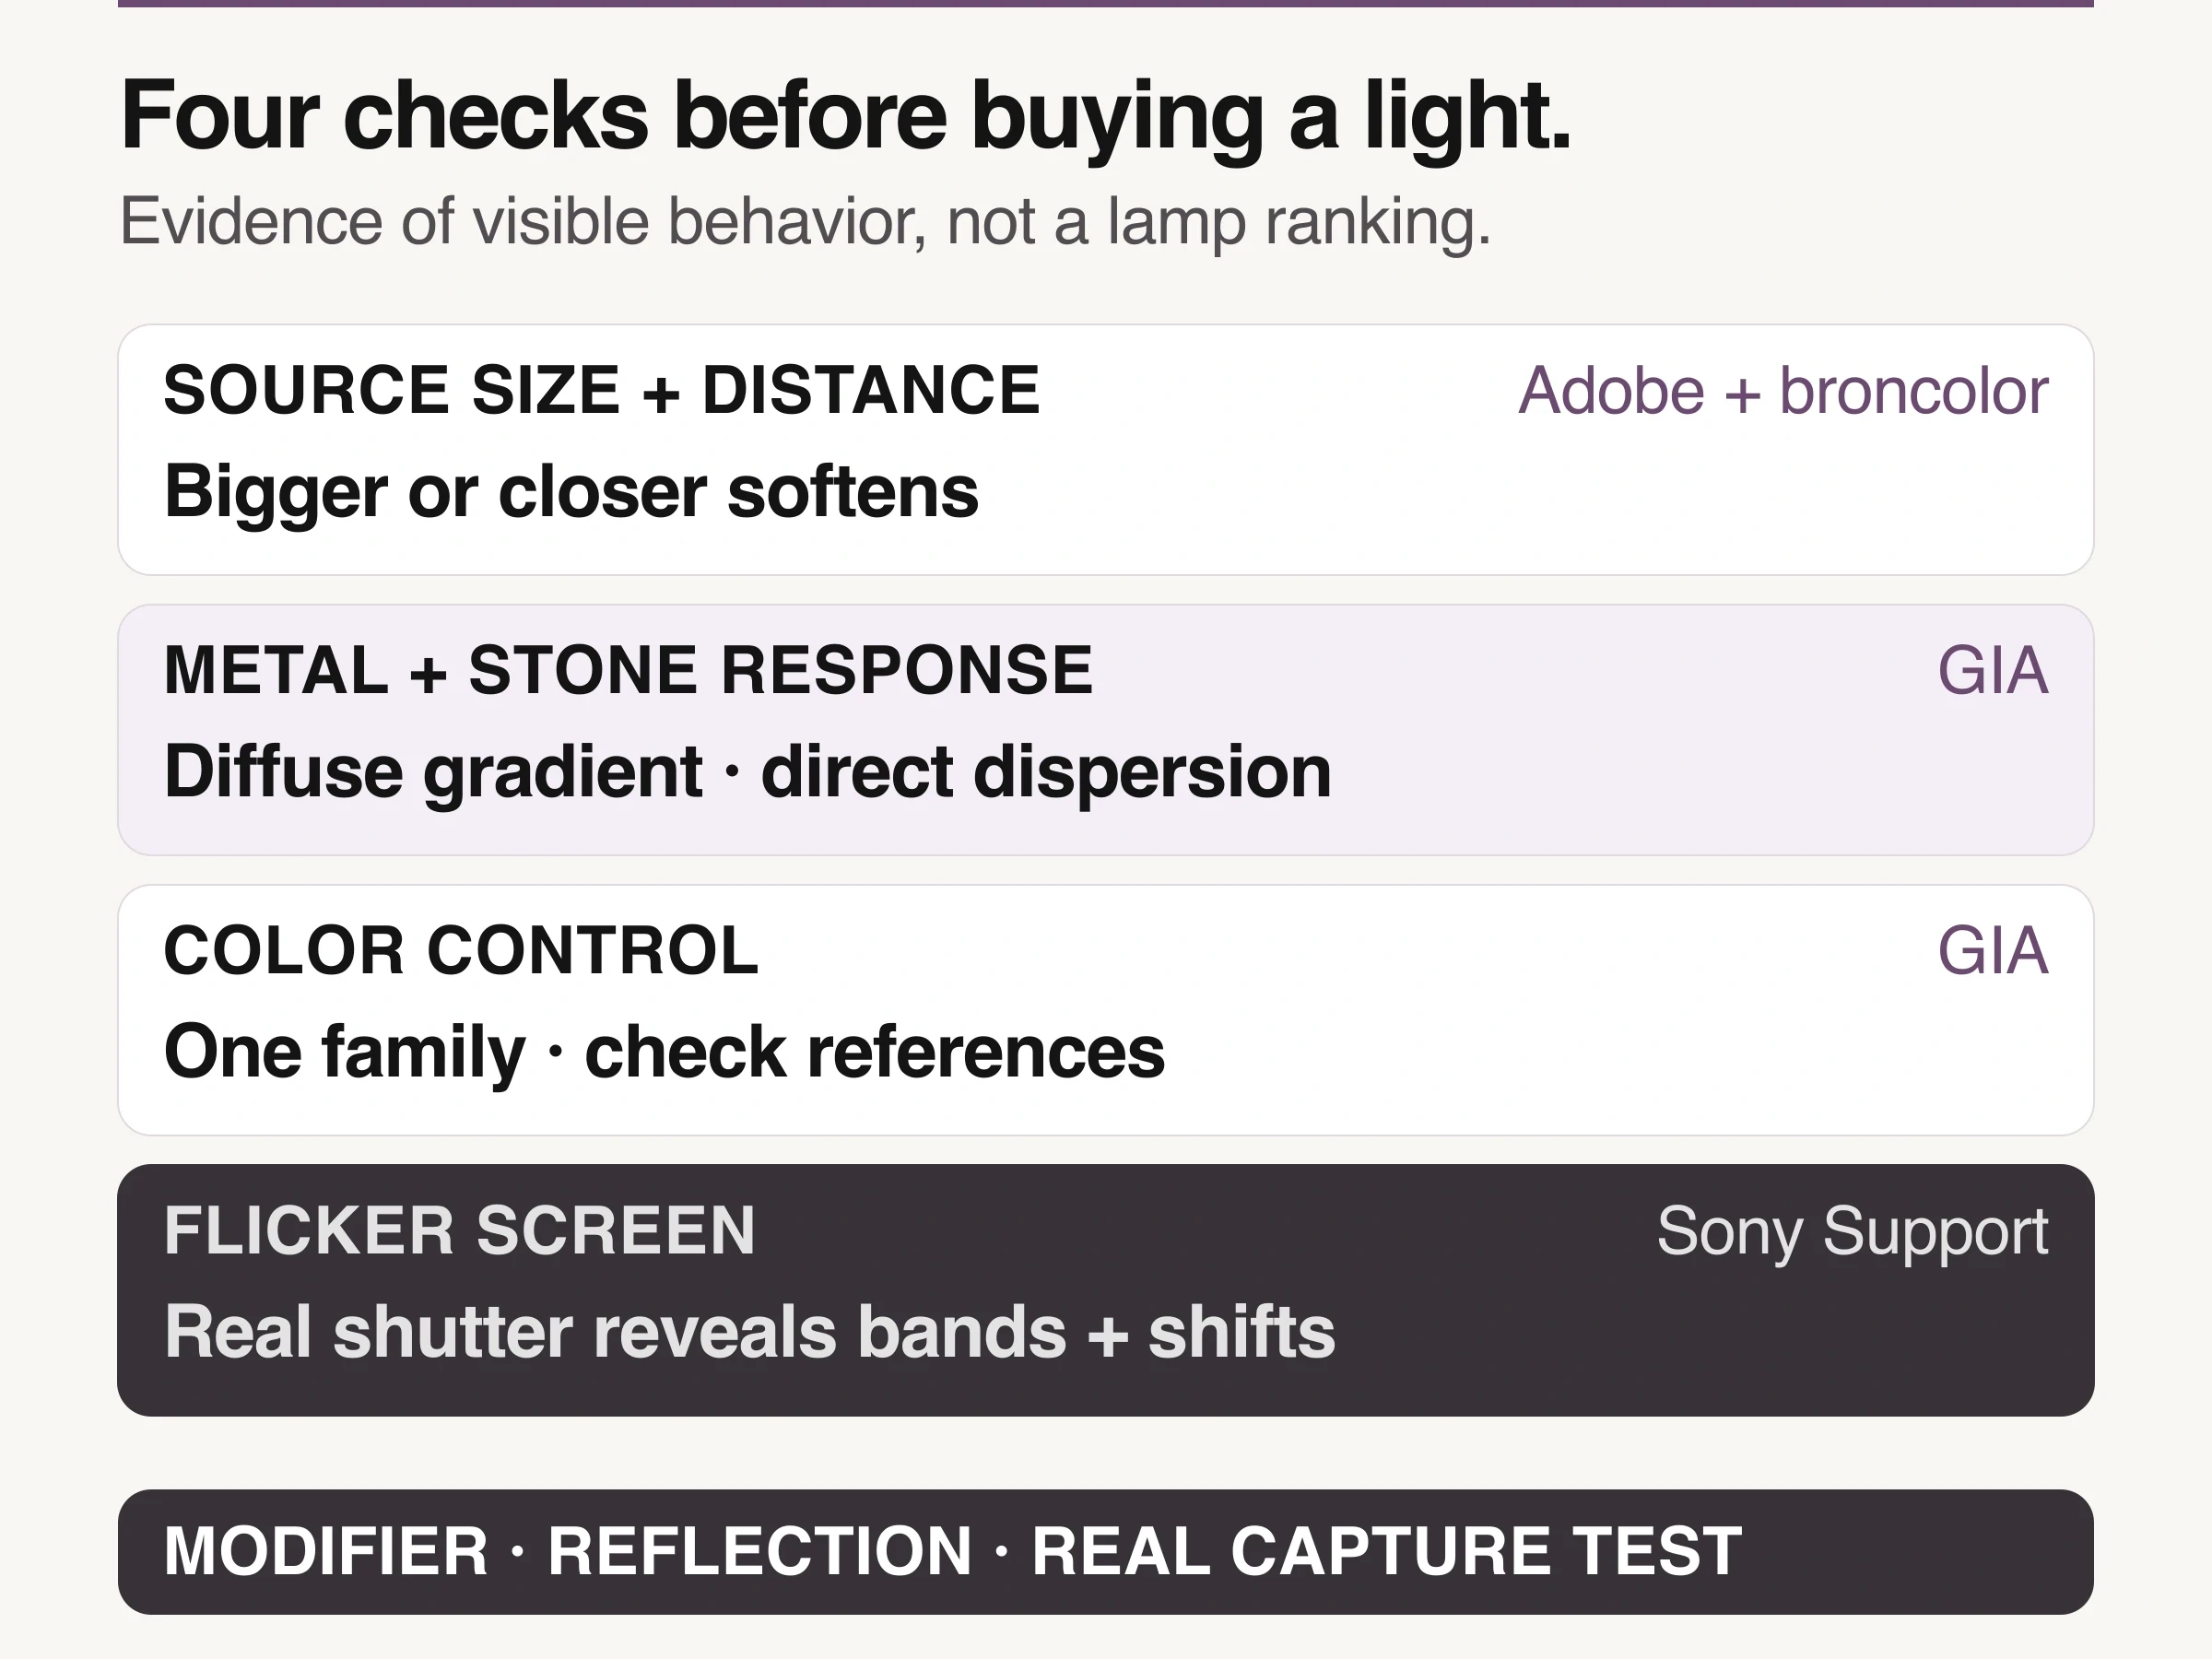
Sources: GIA, Adobe, broncolor, and Sony Support, checked September 1, 2026. These controls explain visible behavior and capture risk; they do not rank a lamp.
Fourth, judge physical control: modifier compatibility, stand stability, quiet dimming, enough clearance to move diffusion close, and enough range to reduce output without forcing an awkward distance.
This evidence does not name a winning lamp. It narrows the audition to the properties that can change the photograph: apparent source size, surface response, color consistency, and flicker behavior.
Build one luminous surface before adding lights
Aim the lamp through a diffusion screen or into a rectangular softbox and look at the surface from the jewelry's position. That glowing rectangle is the effective source. On polished metal, its edges, brightness, and angle become part of the reflected gradient. Moving the lamp behind the screen may alter evenness. Moving the screen relative to the ring changes its apparent size and the transition across the metal.
Adobe's guide to diffused light explains that diffusion scatters a direct source and that a closer source appears softer. Broncolor's hard, soft, and diffused light guide adds an important limit: very broad diffusion can reduce direction, surface structure, and color saturation. Bigger and softer are controls, not automatic goals.
Start with a surface large enough to create a clean, continuous band across the largest curve in the piece. Rotate or translate that surface while watching the metal at capture magnification. If every plane becomes equally pale, reduce the apparent source size, change its angle, or introduce a deliberate dark boundary. If one hotspot clips abruptly, enlarge or move the surface and lower the exposure.
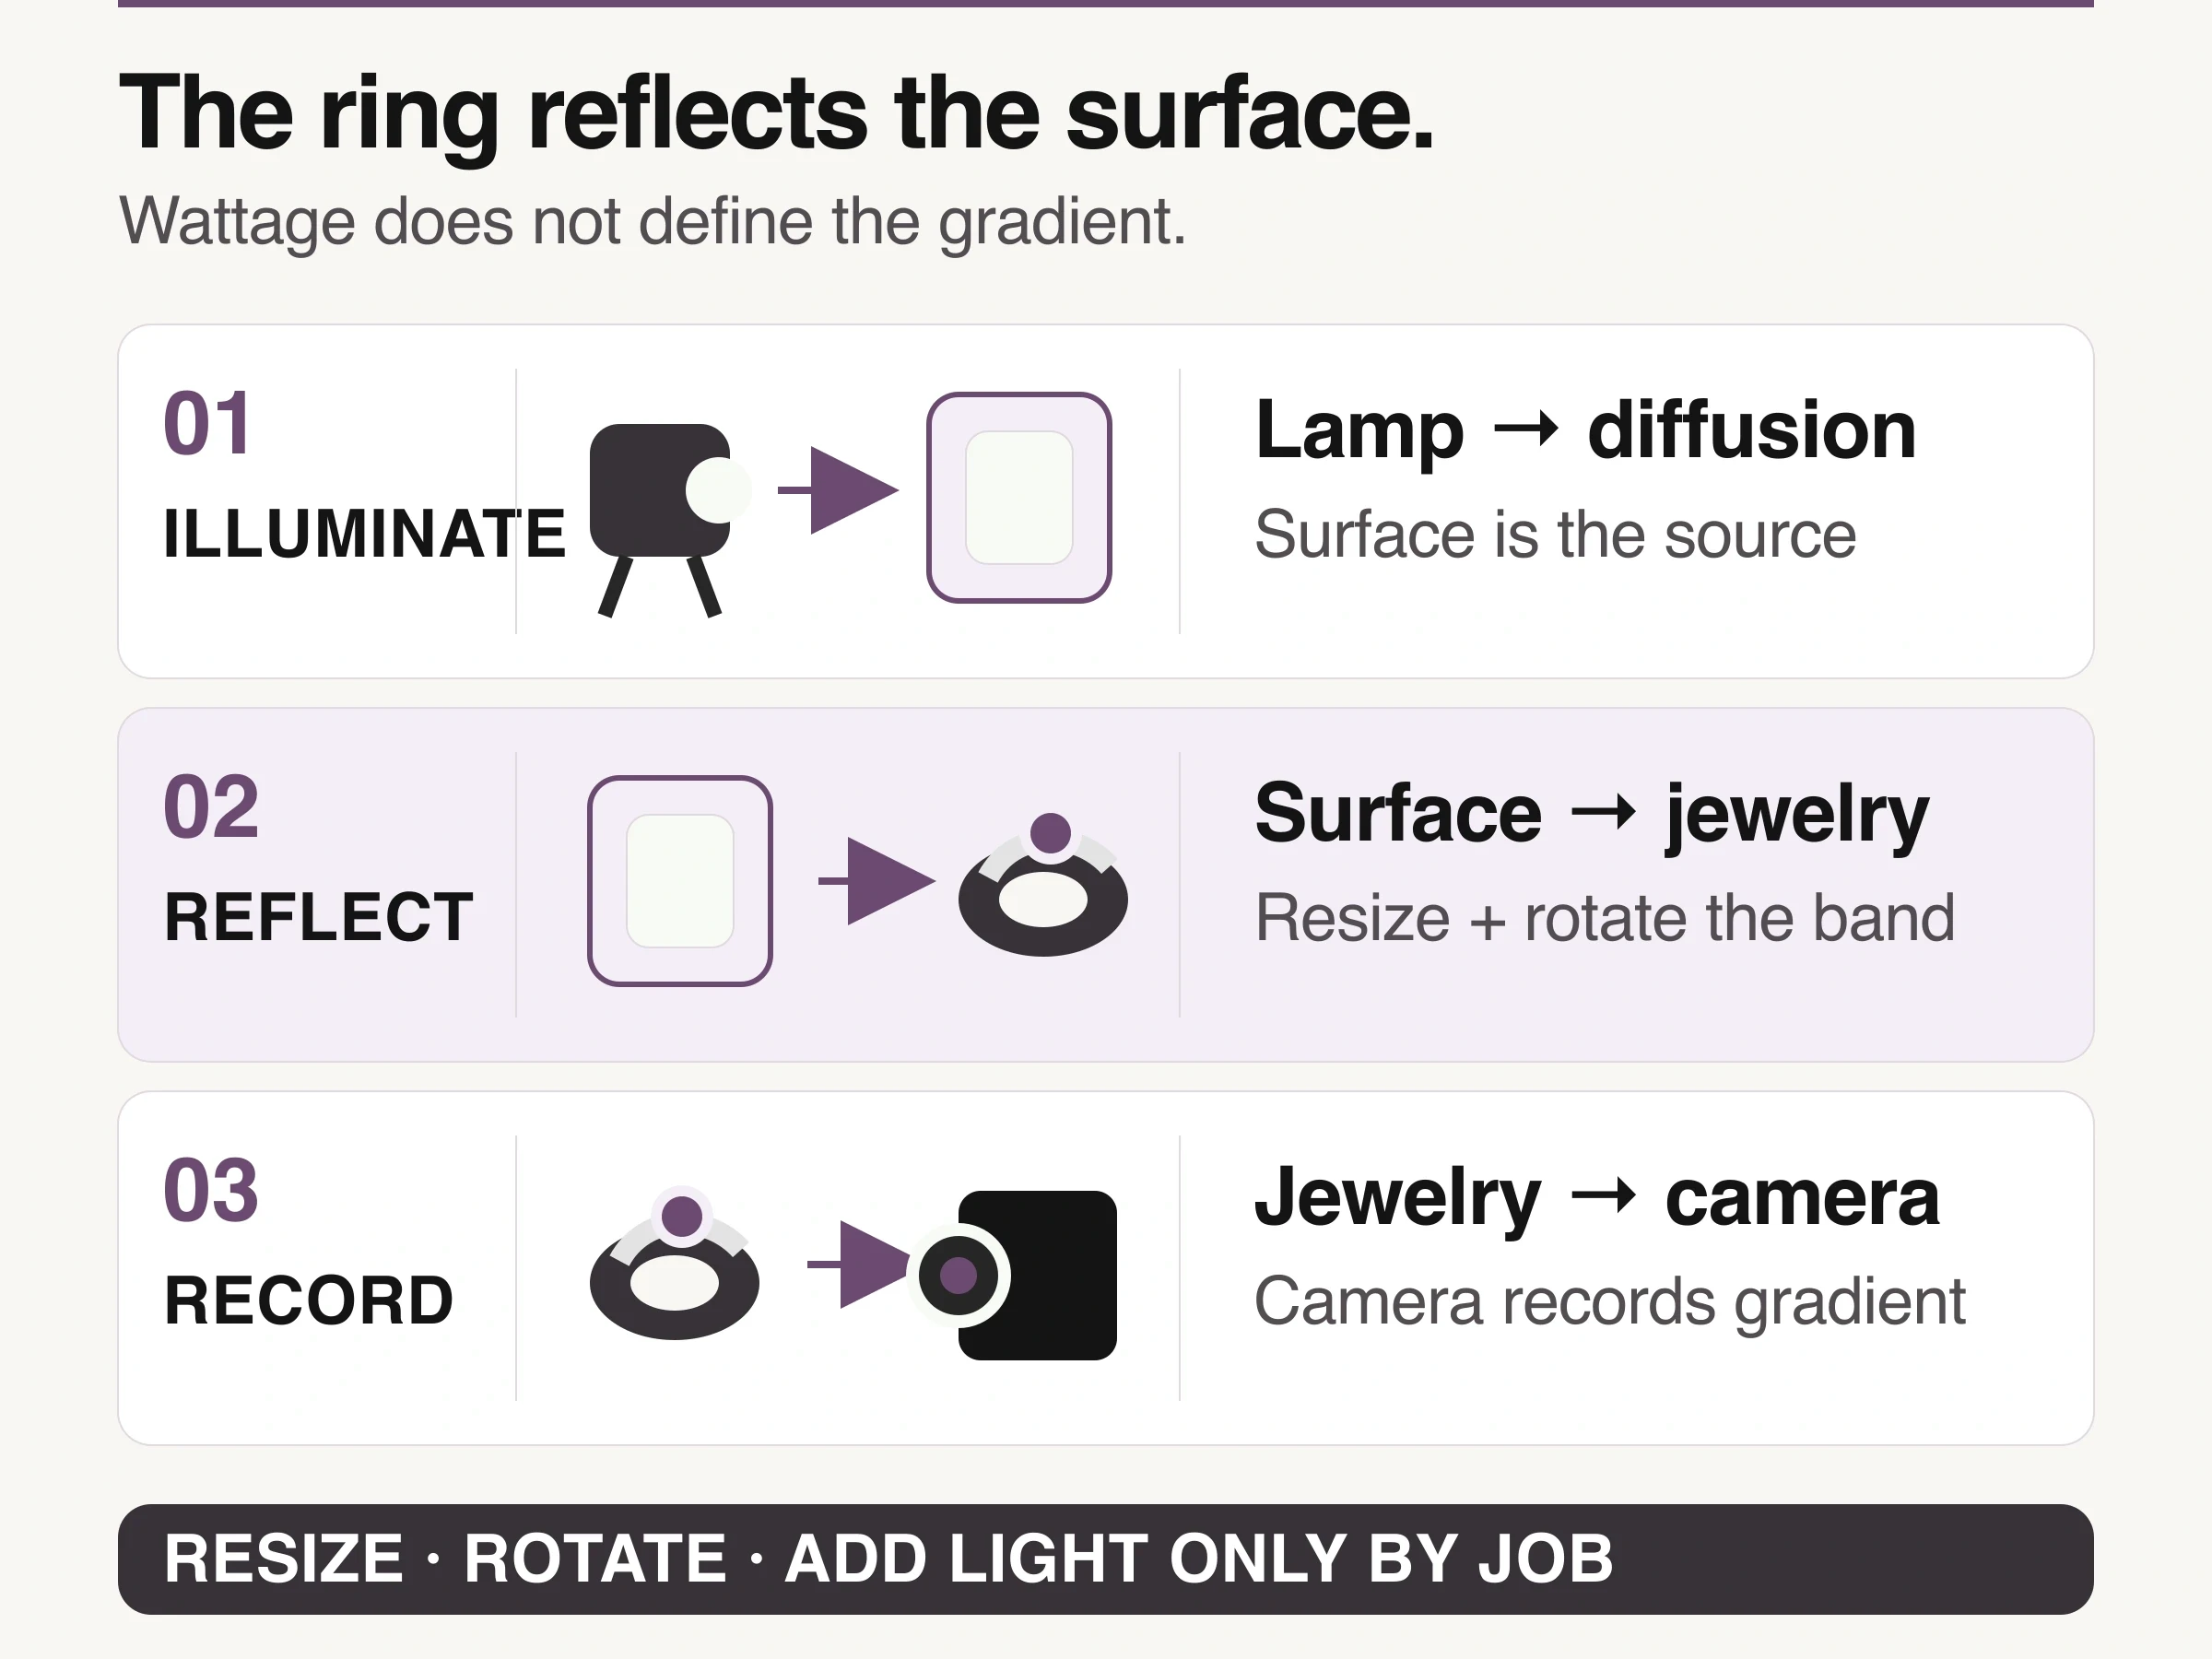
Look Atlas method: resize and rotate the luminous surface before adding another lamp.
The diagram separates the lamp from the surface the jewelry reflects. That distinction lets you change one variable without buying another head.
Match the source to the hardest surface
For polished gold, silver, or platinum, build the broad reflected gradient first. GIA notes that diffused lighting can produce soft tonal gradients in highly polished metal. Preserve at least one controlled dark or midtone boundary so the curve remains legible. An evenly white ring can be technically illuminated and still look flat.
For a faceted transparent stone, establish credible body color under the diffused base before adding sparkle. GIA says direct light can sometimes provoke dispersion, while a mix of direct and diffused light can preserve color and introduce selected sparkle. Keep that direct accent small and movable. If it darkens the stone, obscures inclusions the customer should see, or clips facets into featureless white, it has failed its job.
For a colored transparent stone, test the viewing angle as carefully as the light. Some cuts show different color or brightness when the camera or source shifts. For pearls, brushed metal, carved stone, or beads, begin broad and directional enough to reveal form and texture, then compare the image with the physical piece or an approved reference.
For a mixed piece, light the hardest commercial fact first. That may be the metal gradient, the face-up color of a center stone, or a readable engraving. A second exposure or careful composite can solve conflicting surface needs, but record it and inspect prongs, edges, and stone boundaries for seams. The accepted frame must remain the item being sold.
Run a twenty-minute light audition
Do not judge a light from a portrait demo or its maximum-output screenshot. Use one representative piece with polished metal, a stone, and a small engraved or textured detail. Clean it, lock the camera, turn off competing room lights, and use a fixed white-balance method.
Make this short audition before committing to a kit:
Photograph the piece with the intended modifier at low, middle, and high output.
Inspect the metal gradient, stone color, fine detail, and background at 100 percent.
Move the luminous surface closer, then farther, while keeping exposure comparable.
Rotate the source until the reflected band explains the curve without hiding the setting.
Test every still shutter speed and video frame rate the team expects to use for bands or color shifts.
Leave the setup on for a realistic batch interval, then repeat the neutral reference and hero piece.
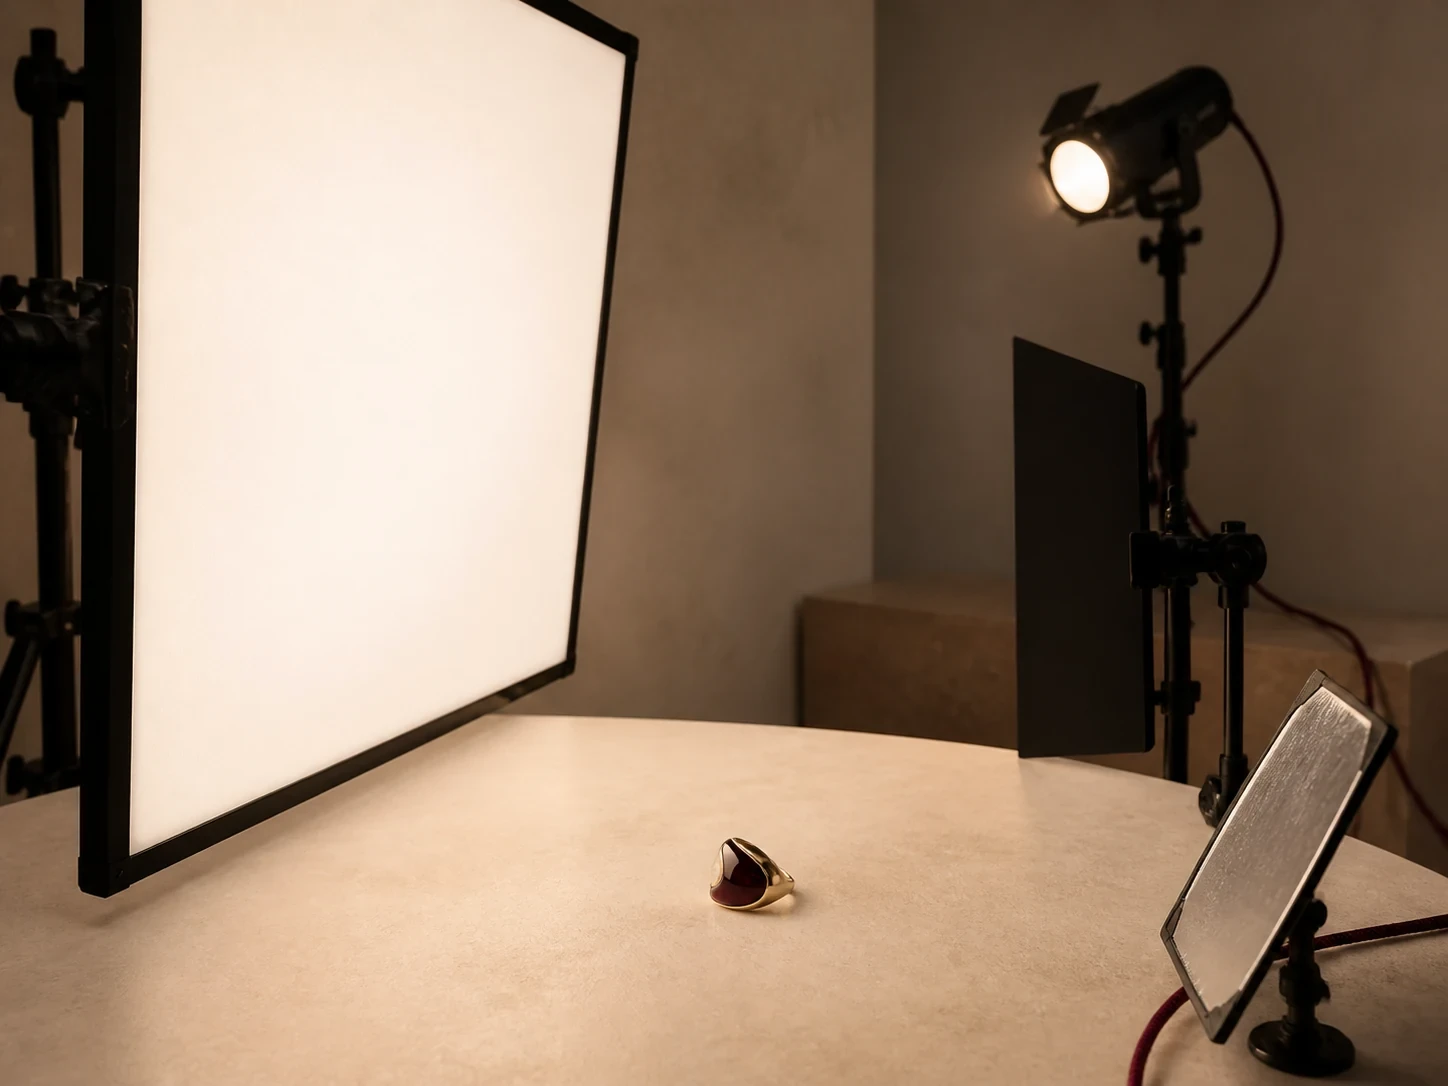
Conceptual illustration: the lamp illuminates a large diffusion surface for the ring to reflect; this is not evidence of a measured lighting result.
The purpose is not to make six portfolio images. It is to find whether the source remains controllable through the positions, power levels, and capture modes your catalog requires.
Give every additional light one named job
One light can make a complete catalog frame when its reflected surface is shaped well. Add a second only after the first frame has a diagnosed limitation. Useful jobs include a narrow stone accent, a separate background value, or a restrained edge on an open set. “Fill everything” is not a job because it removes the contrast needed to read form.
Keep the camera and piece fixed while placing the new source. Compare the file with the one-light baseline at equal overall exposure. If the second head changes color, creates a second uncontrolled highlight, or forces both lights so far away that the apparent sources become hard, remove it.
For an enclosed, repeatable catalog environment, the light-box jewelry photography guide covers diffusion and reflection-card placement. This guide owns the choice and audition of the light itself; the box guide owns the enclosure and saved setup.
Save the accepted light as a production record
Record the light model, capture mode, power, color setting, modifier, diffusion material, source-to-screen distance, screen-to-product distance, camera white balance, exposure, and room-light state. Add a phone photo from above and one from the camera axis. Tape marks alone are not enough when a stand height or screen angle can change the reflection.
At the start and end of a batch, photograph the neutral reference and the same representative piece. A visual change may come from a dimming setting, room light, screen position, product angle, or retouching, so the record needs enough detail to isolate it.
The professional jewelry photography guide places this light choice inside the larger capture and approval process. Once the clean product master is approved, the Look Atlas jewelry workflow can extend it into on-model context. Compare every generated result back to the accepted master and reject changes to stone shape, setting, prongs, chain, metal color, engraving, or apparent scale.
The practical recommendation is simple: buy one source you can dim or power repeatably, one large modifier or independent diffusion frame, a stable stand, a neutral reference, and enough black and white material to shape what the jewelry sees. Prove that system on your hardest representative piece. Only then decide whether a second light earns a place.
