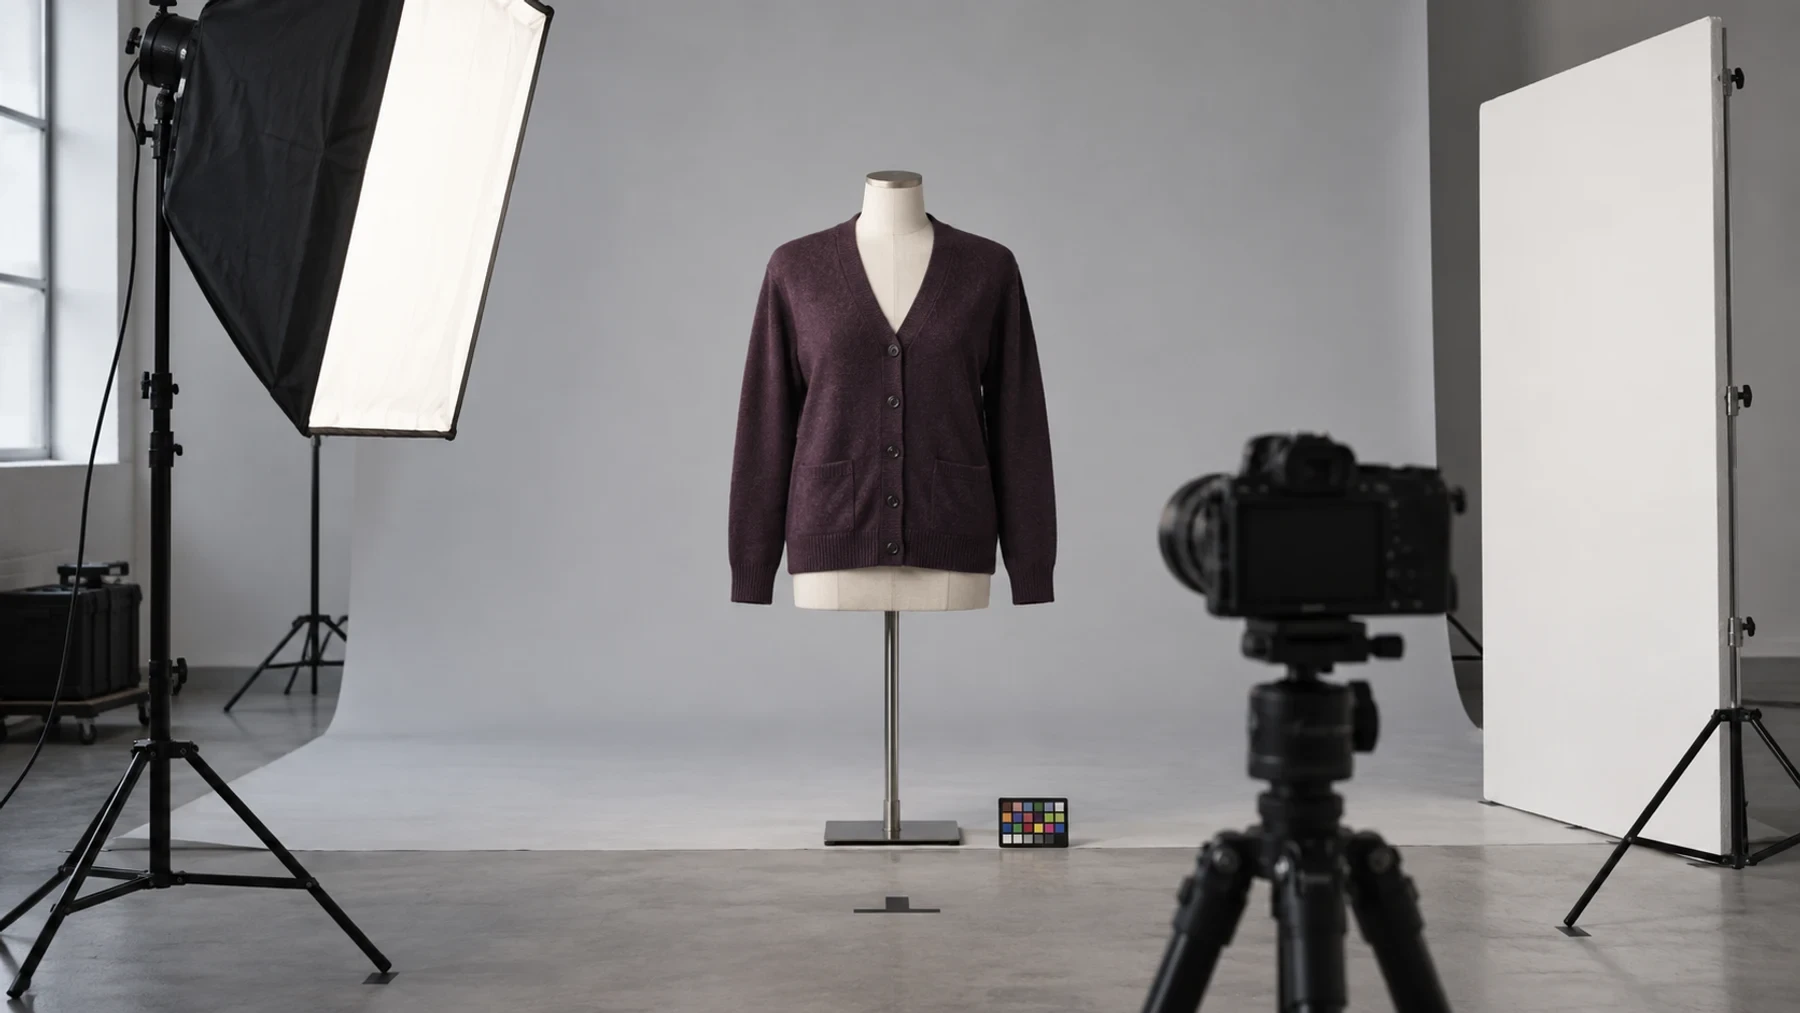
Clothing Photography Setup: Build a Repeatable Capture Bay
A reliable clothing photography setup is a fixed relationship between the garment, camera, light, background, and review screen. Choose one display method, lock those positions, and prove that the set can be rebuilt before buying more gear. The goal is not a brighter photograph. It is a batch in which color, scale, crop, texture, and silhouette change only when the product changes.
This guide is for a small ecommerce team building a practical catalog station. It covers the physical setup and its acceptance test. For a larger room plan with preparation, capture, lighting, and review zones, use the apparel photography studio setup specification.
Choose one capture lane before buying gear
Start with the image job, because flat lay, mannequin, and on-model photographs need different clearances and prove different things. A flat lay is useful for a square-on record of shape, print, and construction. A mannequin adds volume but cannot prove fit on a person. An on-model frame can show drape and proportion on that model, yet it adds movement, talent, and styling variables.
Do not build all three lanes at once in a small room. Choose the lane that produces the primary product-truth frame for most of the catalog. Test it with the largest garment and the hardest material you routinely sell. Add a second lane only when the shot list names a question the first one cannot answer.
Product question | Setup commitment |
|---|---|
Is shape, print, or construction the main fact? | Flat lay with the camera square to a fixed surface |
Does the garment need visible volume? | Mannequin with a fixed center line and repeatable support |
Must the buyer see drape on a person? | On-model lane with floor marks, pose direction, and fit notes |
Choose the first lane by the product fact it must show; add another only when the shot list names a missing question.
Shopify's current clothing-photography guide describes flat lay, mannequin or model, and lifestyle approaches as distinct choices. Treat that list as a branching decision, not a requirement to create every style for every SKU. The broader clothing photography for ecommerce guide can help map those formats to a complete image set.
Build the capture envelope around the garment
Place the garment or mannequin first. Then define four anchors: the background edge, subject center, camera axis, and front edge of the key light. Add a fill card on the opposite side only after the key reveals the material correctly. This creates a capture envelope that can be photographed from above and rebuilt from marks.
Keep stands, cables, and the preparation table outside the camera lane. A garment should be able to move from rail to preparation to set without passing behind a hot light or through the tripod position. Mark stand footprints rather than a single point, because angle and height can change even when one leg returns to the tape.
Use one reference garment to approve the envelope. It should expose a real catalog risk, such as black ribbing, pale fabric against a light background, reflective hardware, or a structured shoulder. Save an overhead setup photograph and the accepted product frame together.
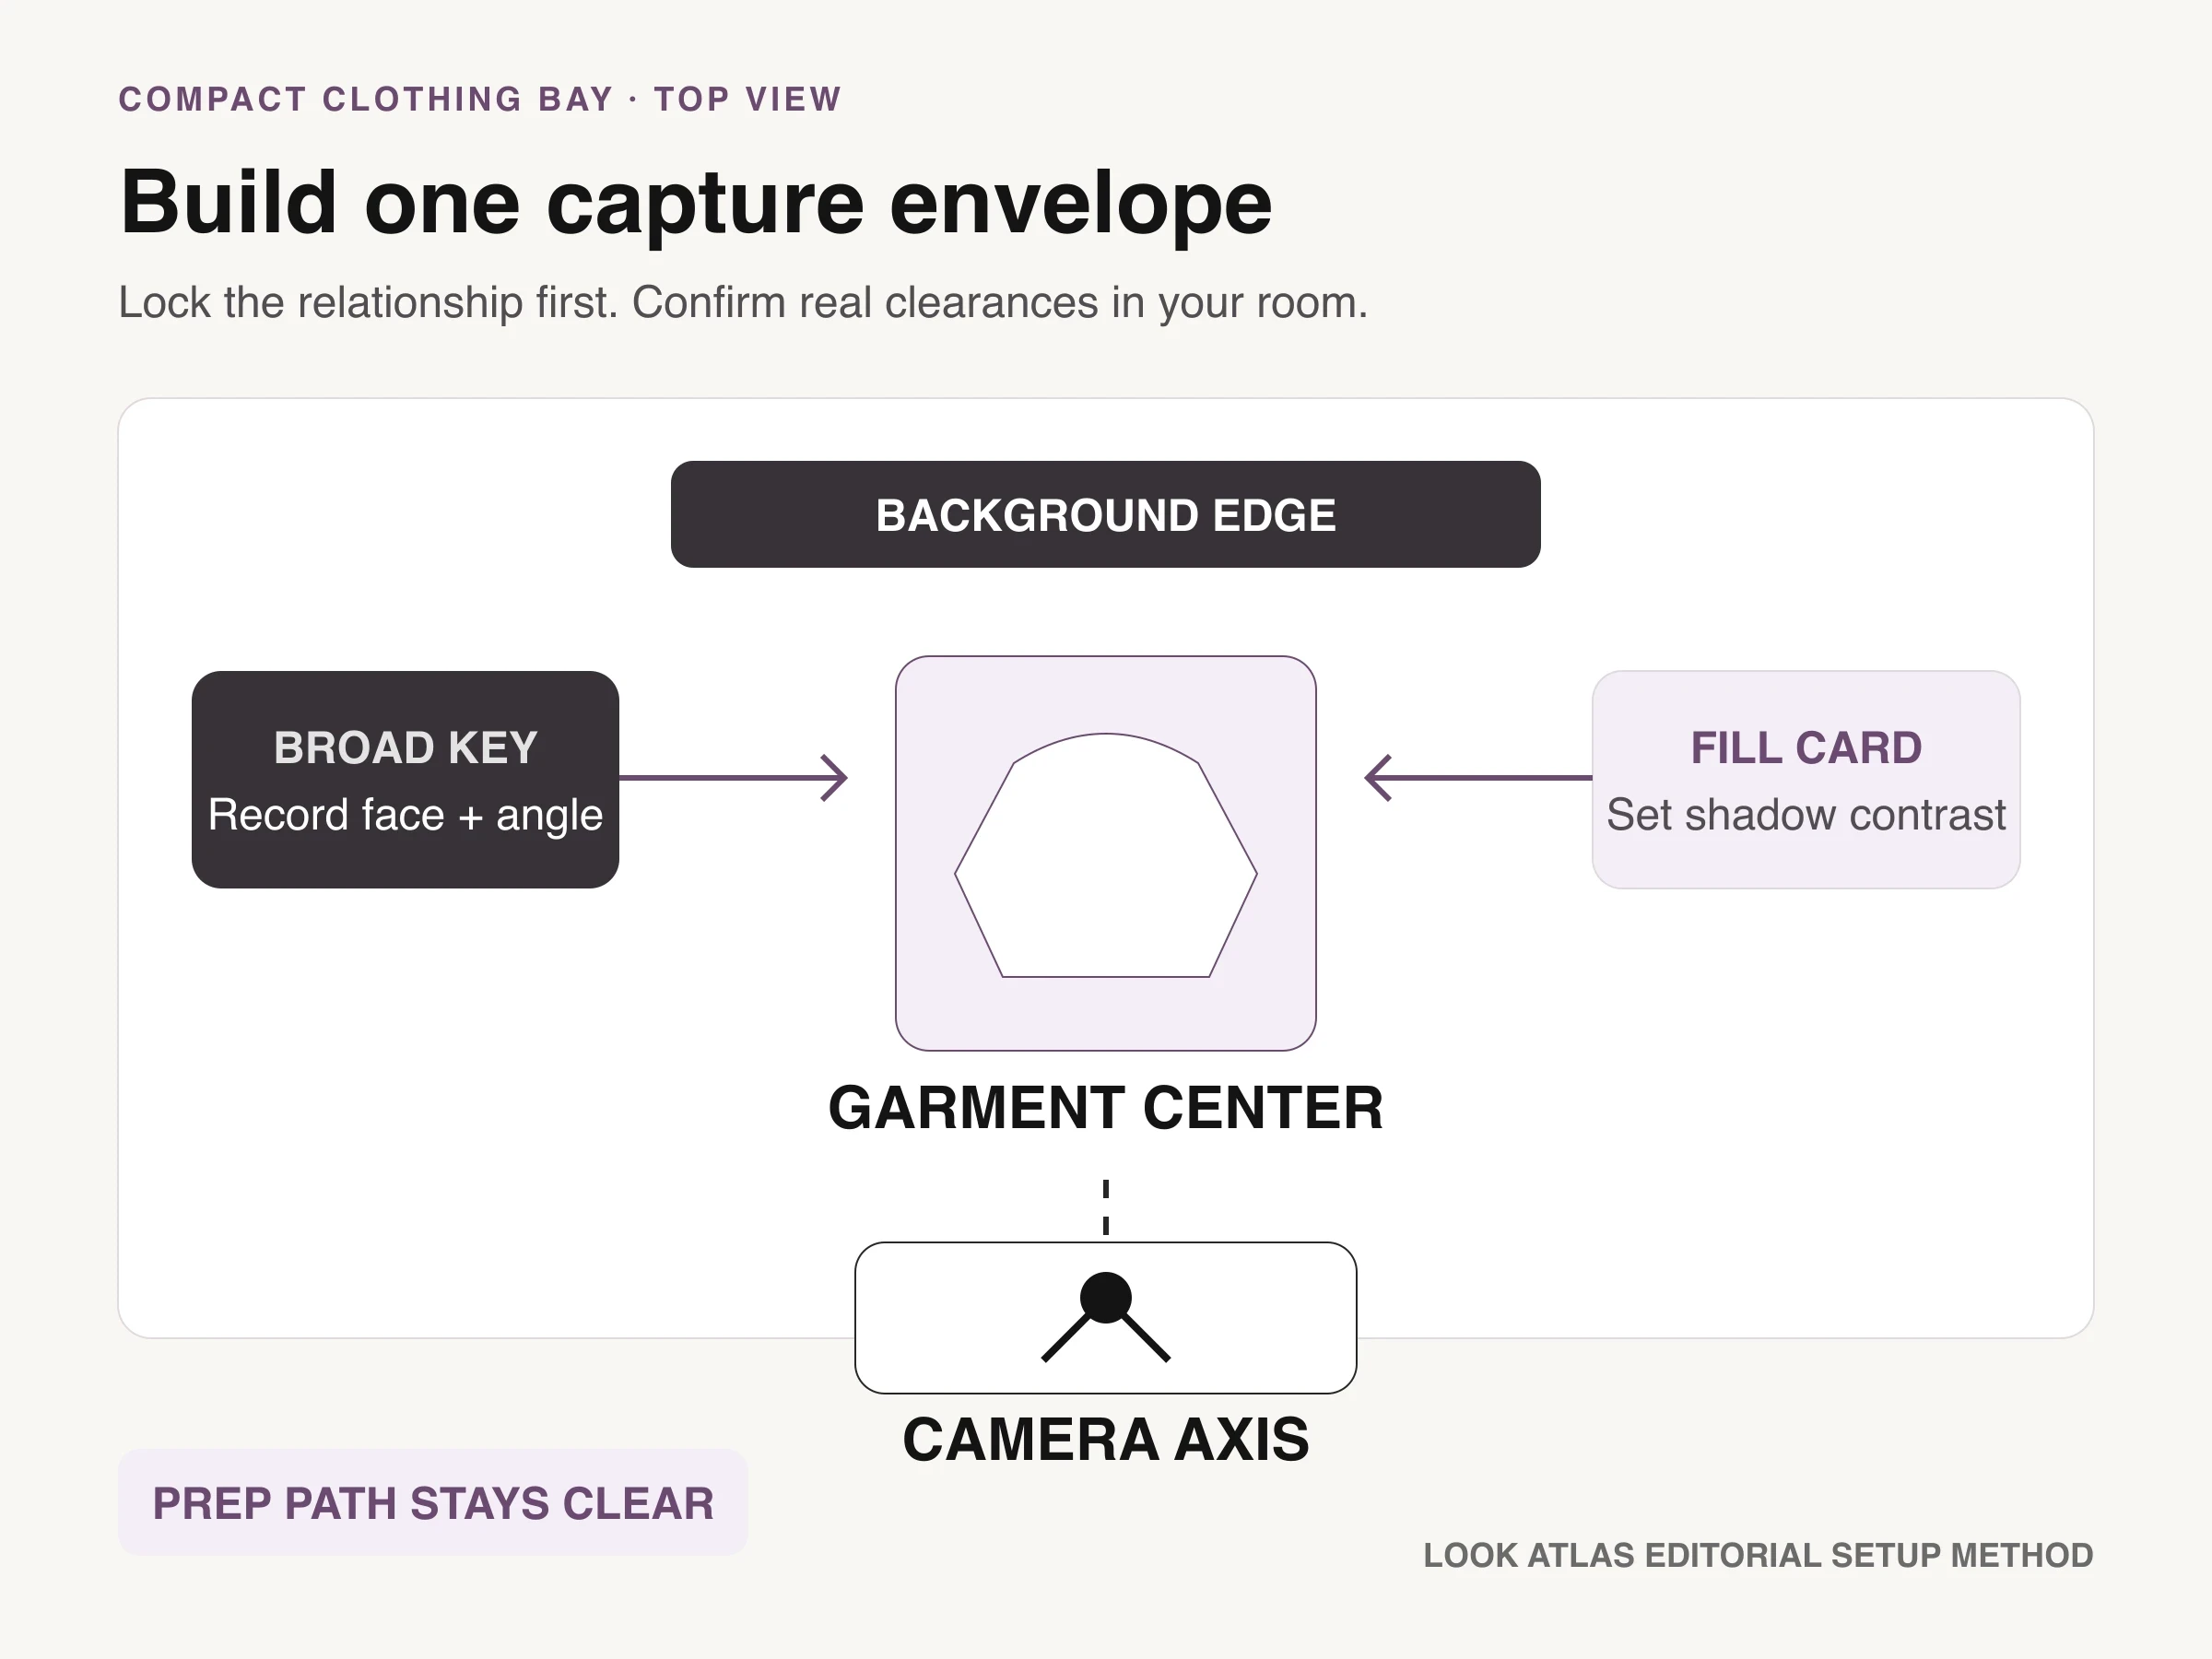
Look Atlas setup method: lock the relationship first, then confirm dimensions, stand clearance, and cable safety in the real room.
The map is a relationship diagram, not a universal room dimension. Camera distance depends on the lens, sensor, crop, and largest garment. Light distance depends on modifier size, output, and material response. Confirm safe stand clearance and cable routing in the real space before fixing marks.
Use one broad key before adding more lights
Begin with one broad diffused source placed off the camera axis, then shape the shadow side with a white or black card. A large source can reveal fabric texture without making every fold a hard shadow. The fill card changes contrast without introducing a second light color or a second highlight direction.
Adobe's product-photography guidance recommends a clean background, soft diffused light, and a locked tripod for consistent product-only images. Shopify presents key, fill, and backlight as a common clothing setup. For a small catalog bay, the useful question is not how many heads are available. It is whether each added source has a named job that the base frame cannot perform.
Distance is part of the recipe. NASA's inverse-square lesson states that brightness from a point source varies with the inverse square of distance. The chart below shows that mathematical relationship. A close, large softbox is not a point source, so the exact percentages will differ in a real studio. The operational lesson still holds: an unrecorded distance change can alter exposure and contrast.
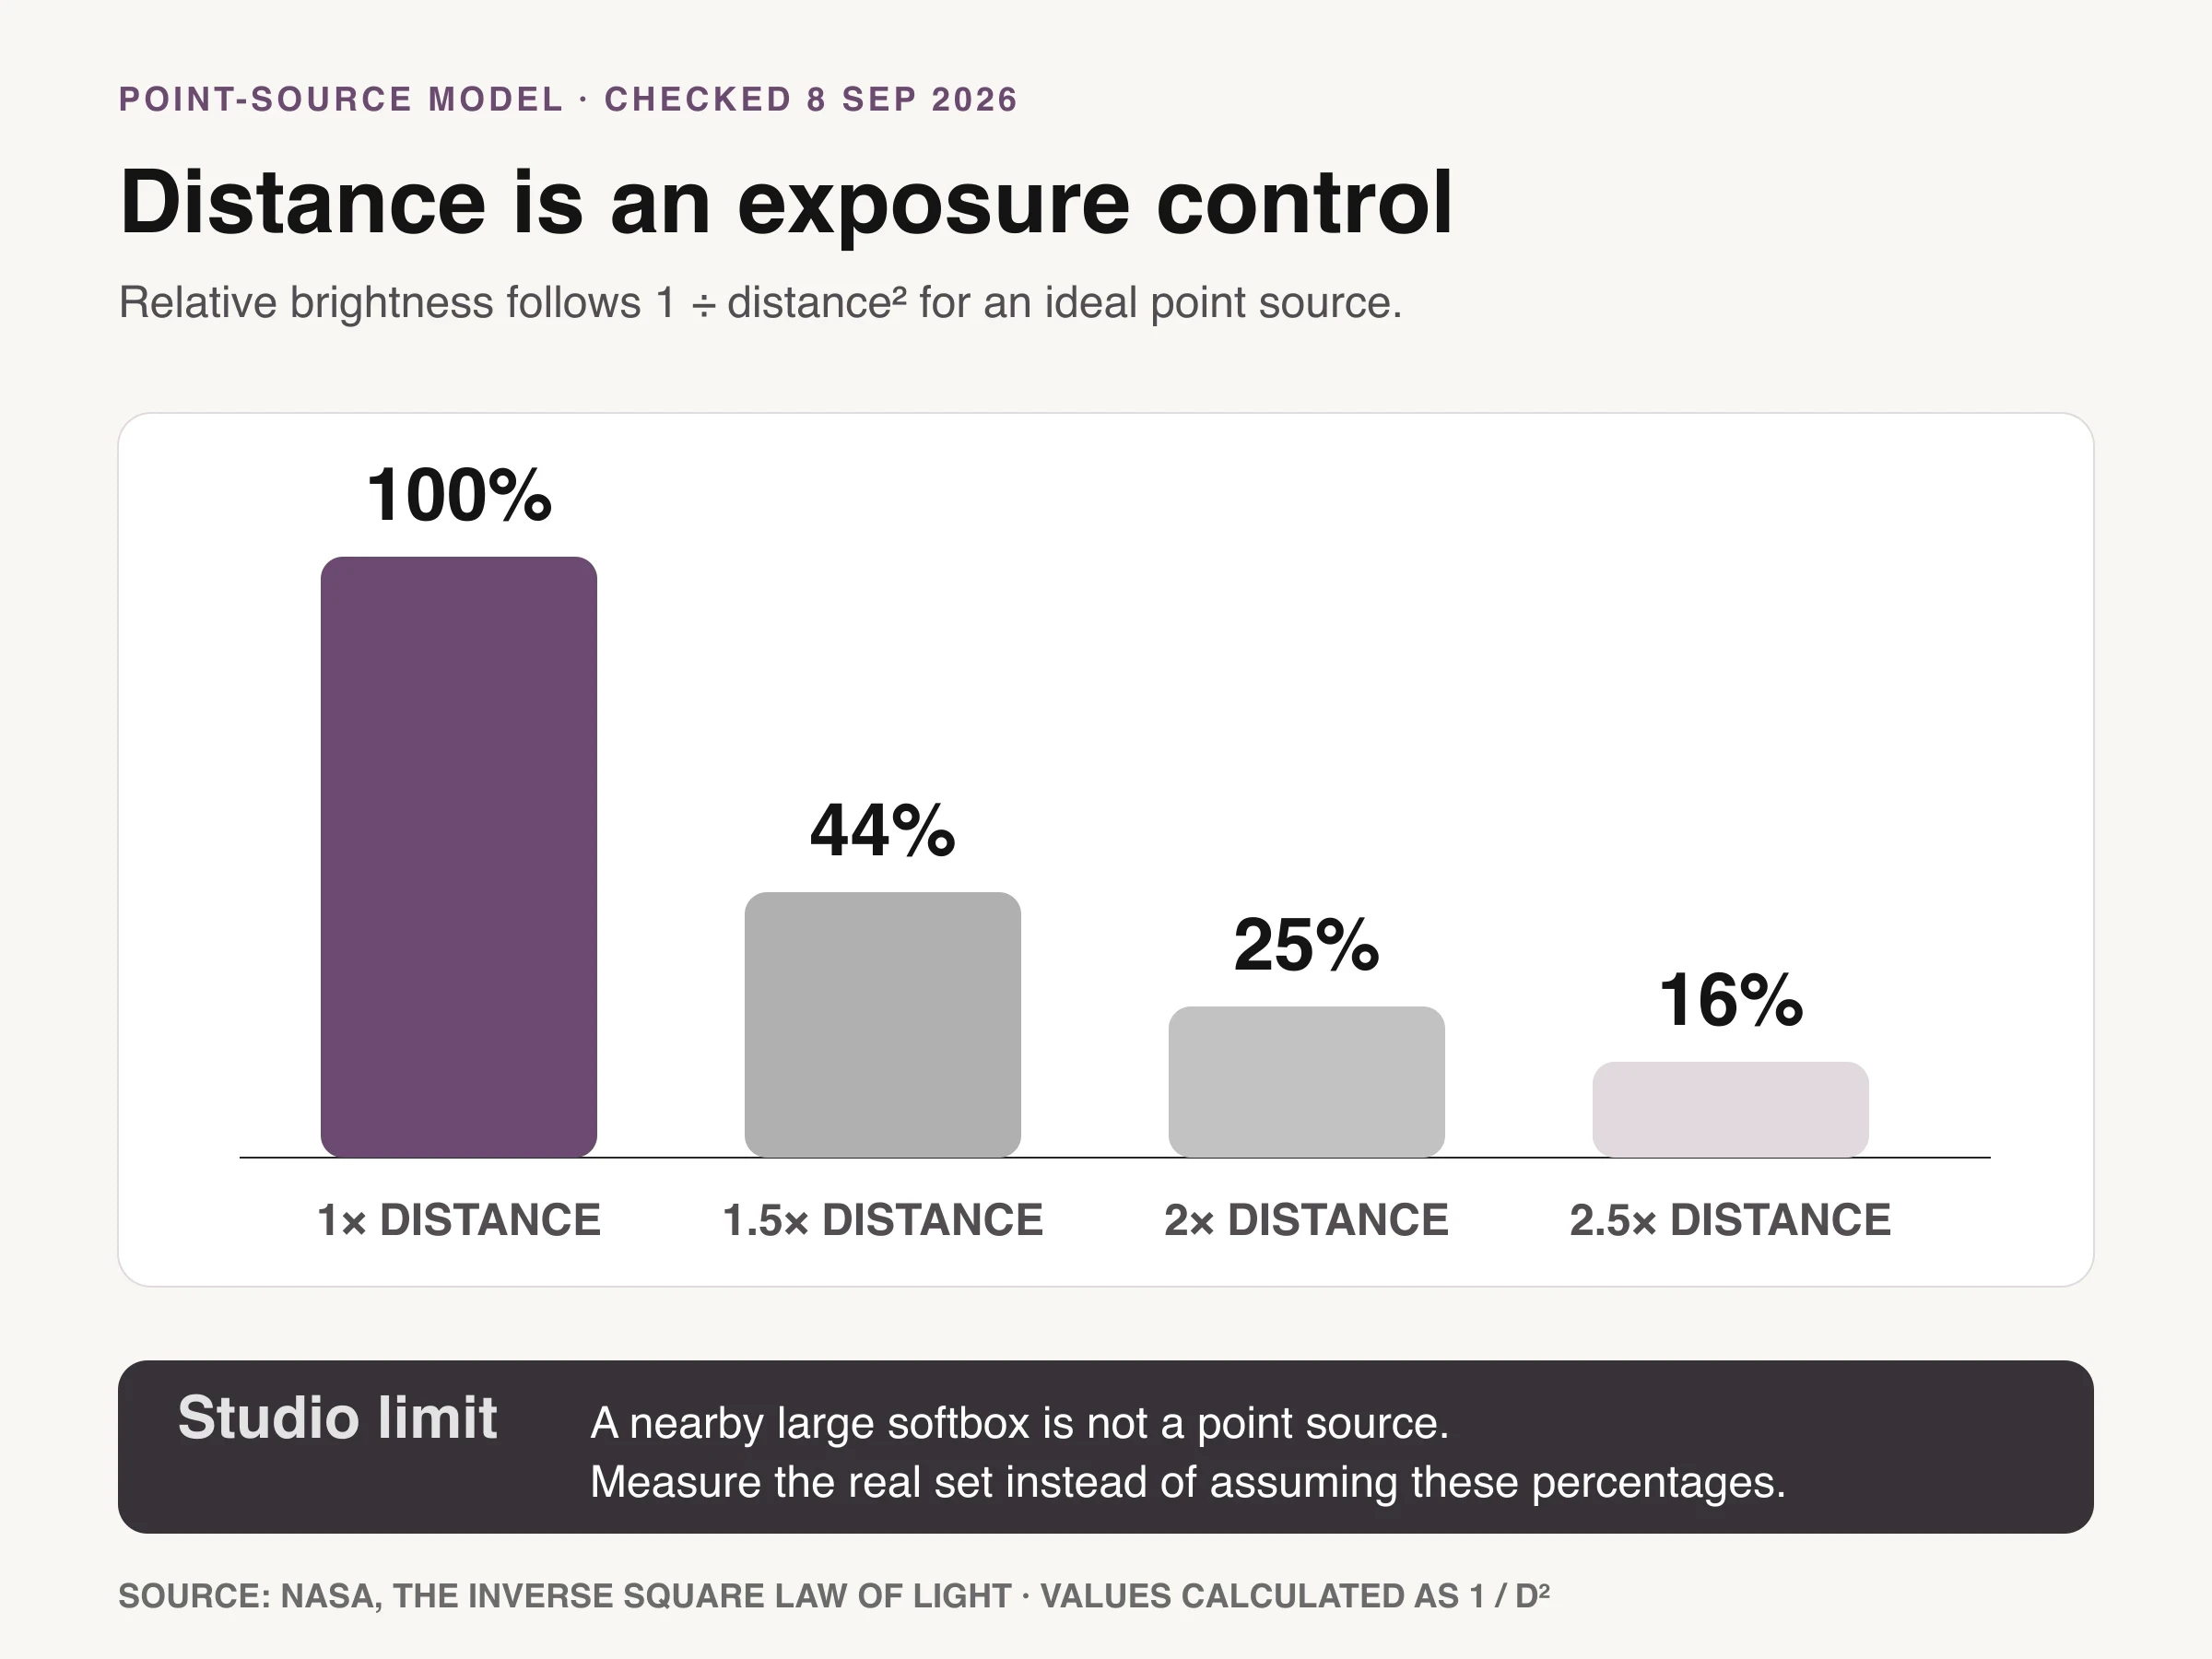
Sourced evidence chart: NASA's inverse-square relationship, with values calculated as 1 divided by distance squared. A nearby large softbox is not a point source, so measure the real set.
Move the modifier with a ruler and a test frame, not with “a little closer.” Record its face-to-subject distance, height, angle, power, and diffusion. If a black knit loses texture, change one control and name the failure it solves. If pale fabric disappears into the background, add edge contrast before making the whole frame darker.
Lock the camera plane and crop before styling
For a flat lay, keep the sensor plane parallel to the shooting surface. For a mannequin, begin with the camera facing the garment's center rather than looking sharply up or down. The point is to prevent a camera move from masquerading as a change in shoulder width, hem length, or sleeve proportion.
Use a tripod even when shutter speed is not a concern. Adobe notes that a tripod and manual focus are practical for a stationary product and that a shutter release helps preserve alignment. Save a crop overlay or reference frame, then compare each new SKU against it at capture time. Do not fix inconsistent scale by stretching files later.
Choose exposure for the fabric that must remain legible. Keep the lowest practical sensitivity for the camera and light available, use an aperture that holds the required construction in focus, and adjust light output or shutter time for a stationary garment. These are decisions to test, not universal camera numbers.
Prepare the garment before touching exposure
Lighting cannot repair a twisted placket, collapsed collar, lint, or undisclosed pinning. Confirm the SKU, colorway, size sample, and requested view. Follow the care label when steaming or pressing. Then clean the surface, set closures, align the center line, shape sleeves, and inspect seams, pockets, hardware, print, and hem.
Adobe explicitly calls out ironing unwanted wrinkles before photographing clothing. Record any clip, tissue, support, or temporary tailoring that changes the outline. A styling aid may help present the intended shape, but it should not silently turn one fit into another.
Color needs its own capture evidence. Photograph a neutral or color reference under the final light, and make a new reference whenever the camera, lens, modifier, power, or room light changes. Adobe's Camera Raw documentation explains that a neutral area can be used to correct scene-light color, while Calibrite ties custom camera profiles to the camera, lens, and lighting combination. White balance is one control in the chain, not proof that every fabric color is accurate.
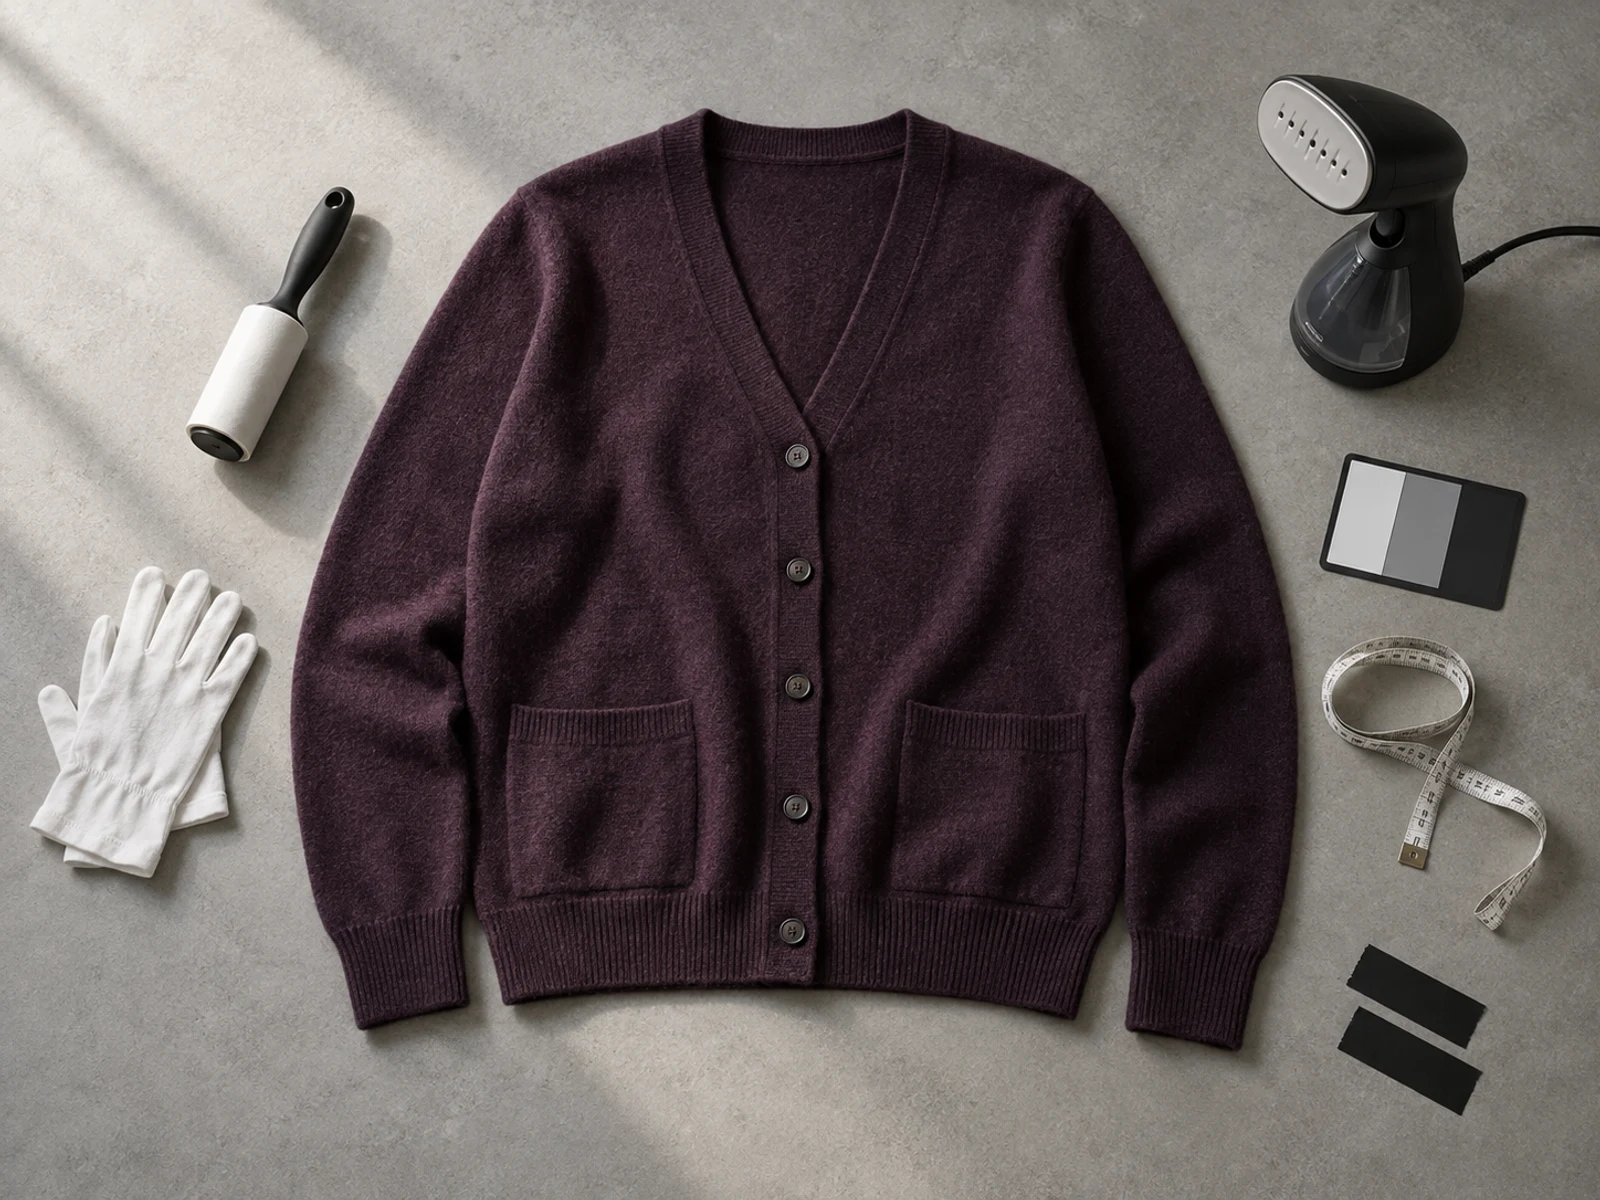
Conceptual illustration: an orderly garment-preparation station with fictional unbranded tools and clothing. It is not a customer sample or measured workflow result.
Approve the setup with a rebuild test
Capture a short baseline before the first production batch: front product frame, back, material detail, construction detail, and the neutral reference. Review at full size for texture, clipping, moiré, dust, false color, and retouch artifacts. Review again in the catalog crop for scale, center line, background, and shadow continuity.
Then clear the set, rebuild it from the record, and photograph the same reference garment. The setup passes when another operator can restore the crop, light direction, background value, garment support, and color-reference process without relying on memory. If the comparison changes, update the record or improve the physical marks before scaling.
Keep exception recipes separate from the baseline. A black knit, satin blouse, white shirt, fine stripe, and reflective zipper may each need a controlled change. Record which variable moved, why it moved, and which visible condition proves the fix. That creates useful flexibility without turning every SKU into a fresh experiment.
Extend only after the product-truth frame passes
Once the physical source set is approved, Look Atlas AI fashion photography can extend selected garments into directed on-model, studio, lifestyle, and campaign-style imagery. The handoff should include the approved source images, styling record, material risks, and rejection rules. Generated context is not a substitute for the factual frame, and every output still needs comparison against the sellable garment.
The practical setup is the one you can explain and rebuild. Choose one lane, lock the capture envelope, record light distance and color reference, prepare the garment against observable checks, and make the second setup match the first before the catalog queue begins.
