
When you hear "Photoshop AI upscale," we're talking about smart tools like Super Resolution and Preserve Details 2.0 that actually rebuild your image with new, convincing detail—they don't just stretch it out. The process essentially quadruples the total pixel count, transforming a lower-resolution photo into something sharp and ready for print or high-res web use. It's the modern way to enlarge images without sacrificing quality.
Why AI Upscaling Is a Game Changer for Your Images
We've all been there—trying to enlarge a photo only to end up with a blurry, pixelated mess. Old-school upscaling methods just stretched the existing pixels, which always led to soft, artifact-filled images.
A Photoshop AI upscale works completely differently. It uses machine learning to analyze the content of your photo—it understands the textures, the edges, and the patterns. From there, it intelligently generates brand new, realistic pixels to fill in the gaps. Think of it less like stretching a photograph and more like having a digital artist meticulously repaint it at a much higher resolution.
This kind of technology is no longer a "nice-to-have"; it's a must. In a market driven by high-resolution screens and picky online platforms, crisp, clear images are everything. This trend is backed up by some pretty staggering numbers. The use of generative AI in marketing shot up from just 33% in 2023 to a massive 71% in 2024, with image enhancement being one of the main drivers. You can dig deeper into how AI is shaping advertising with these statistics from amraandelma.com.
Understanding the Core AI Tools in Photoshop
Adobe Photoshop gives you a few powerful, AI-driven ways to upscale, and each one is built for a different kind of job. Knowing which one to pick will save you a ton of headaches and get you the best possible results.
Let's break down the main players:
Super Resolution (in Camera Raw): This is the go-to for most photographers, especially if you're starting with a RAW file. It’s fantastic at creating clean, detailed enlargements by doubling both the width and height. I use this all the time to rescue a photo I had to crop heavily or when I need to prep an image for a big print.
Preserve Details 2.0 (in Image Size): This tool is tucked away in the standard 'Image Size' dialog box and gives you a bit more hands-on control. Its 'Reduce Noise' slider is a lifesaver for fine-tuning the upscale and killing any unwanted digital grain. It's my choice for complex graphics or photos that need a more delicate touch.
Generative Upscale (Beta): As one of the newer tools, this one actually regenerates the image from scratch based on the original content. It can be incredibly useful for very low-resolution files, like old scanned photos or tiny web graphics, where it has to invent plausible details to make the image usable.
Choosing Your Photoshop AI Upscaling Method
Not sure which tool to reach for? Here’s a quick comparison of the primary AI-powered upscaling techniques in Photoshop to help you choose the right tool for your project.
Method | Best For | Key Feature |
|---|---|---|
Super Resolution | RAW files, photography, and getting maximum detail from high-quality sources. | Creates a new, enhanced DNG file, preserving the original. It's clean and artifact-free. |
Preserve Details 2.0 | JPEGs, PNGs, and images where you need to balance sharpness with noise control. | The Reduce Noise slider gives you direct control over the final texture and smoothness. |
Generative Upscale (Beta) | Very low-resolution images, web graphics, or old scans that need significant rebuilding. | "Invents" new details to fill in gaps where other methods might fail. |
Ultimately, picking the right tool comes down to your source file and your final goal. Experiment with each to see which one gives you the look you're after.
By understanding these distinct tools, you can move beyond a one-size-fits-all approach. Your choice will depend on the source file quality, the desired output, and the level of control you need over the final result.
Getting Maximum Detail with Super Resolution
When you absolutely need the best possible enlargement from a quality source file, my go-to is always Adobe Camera Raw's Super Resolution. This isn't your standard resizing tool; it's a smart AI model trained on millions of images. It intelligently doubles your photo's dimensions, effectively quadrupling the pixel count.
I find myself turning to it all the time. It’s perfect for prepping a heavily cropped wildlife photo for a big gallery print or saving a portrait that was shot with a lower-megapixel camera.
The real magic here is how Super Resolution generates new, believable details. It’s incredibly good at recognizing textures, sharp edges, and fine patterns, then rebuilding them at a higher resolution. This intelligent process is precisely why AI-powered upscaling is taking over the professional world.
In fact, the tech is advancing so fast that its ability to create new detail, rather than just stretching existing pixels, is a huge leap. Some projections show that by 2025, AI upscaling could offer up to a 6x quality enhancement—way beyond the 2x or 3x limit of older methods. You can dive deeper into the future of AI vs traditional upscaling on upscaleimage.ai.
How to Use Super Resolution on Any Image (Not Just RAWs)
A lot of people think Super Resolution only works on RAW files. While it definitely shines with them, you can use this powerful Photoshop AI upscale tool on pretty much anything, including JPEGs, TIFFs, and PNGs. The trick is simply to open the image through the Camera Raw interface instead of directly into Photoshop.
Here’s how I do it:
First, open Adobe Bridge or Photoshop.
Find the image file you want to work with.
Right-click on the file and choose Open in Camera Raw.
With the image loaded in the Camera Raw window, right-click anywhere on the preview.
From that menu, just select Enhance.
This brings up the Enhance dialog box, where you'll see the Super Resolution checkbox waiting for you.
The interface is clean and simple, giving you a preview window that shows a direct before-and-after comparison of the detail you'll gain.
Don't skip that preview! I always use it to zoom in on critical areas like hair, fabric textures, or distant foliage. It’s the best way to make sure the enhancement is actually improving clarity and not introducing weird artifacts.
My Workflow and Best Practices for Super Resolution
Once you hit that "Enhance" button, Photoshop does its thing. The best part? It doesn’t touch your original file. Instead, it creates a brand new, high-resolution Digital Negative (.DNG) file and saves it in the same folder as your source image. This non-destructive approach is a huge plus, keeping your original safe.
Pro Tip: Super Resolution is a "one-and-done" deal. Don't try to apply it more than once to the same image. You’ll just end up with degraded quality and strange artifacts. For the cleanest results, run it once, right at the start of your editing process.
The new DNG file holds all that extra pixel data. From there, you can open it in Photoshop for any other edits—like color grading, retouching, or cropping—confident that you're starting with the most detail possible. In my experience, this method consistently gives me cleaner, sharper results than any other technique, especially when I'm working with high-quality photos.
Getting Granular with Preserve Details 2.0
While Camera Raw’s Super Resolution gets a lot of the attention, there's another powerful Photoshop AI upscale feature that’s been my go-to for years when I need more nuanced control. It’s called Preserve Details 2.0, and it lives right inside the classic ‘Image Size’ dialog box (Image > Image Size).
This method is my secret weapon, especially when I'm deep in a complex, multi-layered document and don't want to break my workflow by jumping to another tool.
The magic happens the moment you select Preserve Details 2.0 from the ‘Resample’ dropdown. A Reduce Noise slider suddenly appears, and this is where you get to put your own touch on the final result. It’s a simple addition, but it makes a world of difference.
This one slider is your direct line to controlling the artifacts that inevitably pop up during a big upscale. It lets you strike that delicate balance between adding sharpness and retaining a natural, pleasing texture.
When to Pick Preserve Details 2.0
So, when should you reach for this instead of the more automated options? I’ve found it’s the clear winner in a few specific scenarios where precision is everything.
Complex Layered Files: Got a project with dozens of layers, adjustment masks, and smart objects? Preserve Details 2.0 lets you resize the entire canvas in one shot without having to flatten your work first.
Logos and Hard-Edged Graphics: For any image with crisp lines and sharp edges, this tool is fantastic. It does a great job of keeping those lines clean and avoiding the slight softness that other algorithms can sometimes introduce.
Fine-Tuning Portraits: Skin texture is the make-or-break detail in portrait upscaling. The noise slider is perfect for dialing back any of that AI-generated smoothness that can make skin look plastic or unnatural.
My personal workflow for this is pretty straightforward. I'll start with the 'Reduce Noise' slider set low, usually around 15-25%. From there, I'll zoom into the preview window, looking closely at detailed areas like fabric textures or hair. I nudge the slider up bit by bit, just until the digital graininess smooths out but before the image starts losing its character.
Dialing in the Reduce Noise Slider
Finding the perfect setting for the Reduce Noise slider is definitely more art than science, but that’s what makes this photoshop ai upscale method so flexible.
Cranking it all the way to 100% is almost always a mistake; you'll end up with an overly soft, waxy finish that screams "digital." But leaving it at 0% can leave you with some crunchy-looking artifacts and jagged edges.
For instance, if I’m enlarging an e-commerce shot of a knit sweater, I might land on a setting around 30%. This is just enough to clean up any background noise while keeping the yarn's texture sharp and clear. But for a clean graphic logo, I might push it closer to 50% to get perfectly smooth, anti-aliased edges.
Your best friend here is the preview window. Constantly click and hold on it to see the "before" and let go to see the "after." That immediate feedback is the fastest way to train your eye and master the tool, ensuring your final images look intentionally enhanced, not artificially processed.
Putting Your Upscaling on Autopilot
Upscaling images one by one works fine when you have a handful of photos. But what happens when you’re staring down a folder with 200 new product shots? That manual approach quickly becomes a productivity killer. This is exactly where automation comes in to save your sanity.
By creating a simple Action in Adobe Photoshop, you can apply your go-to upscaling method across an entire batch of images. Think of an Action as a macro—you record a series of steps once, and Photoshop can then repeat that exact sequence on any file you throw at it. This is the secret to getting consistent, high-quality results across an entire catalog without touching every single file.
How To Build Your First Upscaling Action
Creating an Action sounds technical, but it’s really just about hitting "record" while you do your normal workflow. Let's walk through it.
First, open a representative image from your batch.
Pull up the Actions Panel (you can find it under
Window > Actions).Get organized by creating a new Action Set—just click the little folder icon and name it something memorable like "My AI Upscaling."
Now, click the new action icon (it looks like a little sticky note) to create the action itself. I'd name it something specific, like "Preserve Details 2.0 Upscale - 2x."
Hit the Record button. From this moment on, Photoshop is watching everything you do.
Now, just go through your upscaling process. For example, open the
Image Sizedialog, select Preserve Details 2.0, and enter your desired dimensions.Add a
Save Asstep and choose your format and destination.As a final touch, I always add a
Closestep so my workspace doesn't get cluttered.Once you’re done, just press the Stop button in the Actions Panel.
That’s it. You've just built an automated workflow you can use forever.
Crucial Tip: When you record the "Save As" part of your action, never save over your original files. I always create a dedicated output folder named something like "Upscaled" or "High-Res" to keep the originals safe and the project tidy. It’s a simple step that can prevent a major headache down the line.
The process is really that straightforward. You’re just telling Photoshop what to do once so it can handle the rest.
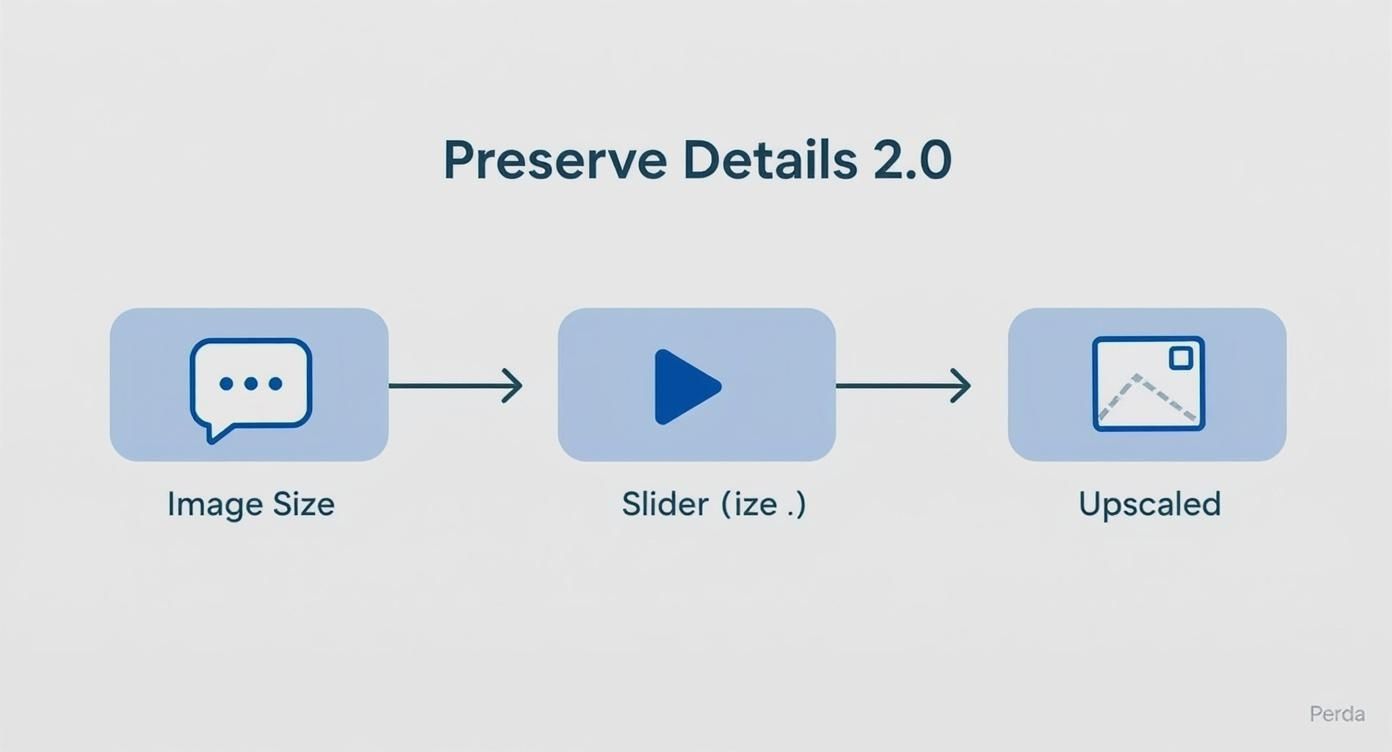
This just shows how you move from the Image Size tool to the final, enhanced image—a simple sequence that the Action memorizes perfectly.
Processing an Entire Folder at Once
With your action recorded, it’s time to let Photoshop do the heavy lifting. The best tool for this job is the Image Processor.
You'll find it under File > Scripts > Image Processor. This handy dialog gives you a simple interface where you:
Select the folder with all your source images.
Choose where you want the new, upscaled files to be saved.
And here's the magic part: tell it to run your custom Action on every photo.
Just select your "My AI Upscaling" set and the "Preserve Details 2.0 Upscale - 2x" action you just made. Hit run, and you can literally walk away. Photoshop will methodically open, upscale, save, and close each image without any more input from you. It's a lifesaver for prepping images for e-commerce sites like Shopify or Amazon, ensuring every shot is crisp, clear, and meets those high-resolution requirements.
How to Fix Common AI Upscaling Problems
https://www.youtube.com/embed/sY26cbSvo2w
Using a Photoshop AI upscale tool can feel like a bit of magic, but the results aren't always perfect right out of the gate. You might notice some weird digital artifacts, skin that looks a little too smooth and waxy, or even slight changes in color and contrast. These are pretty common hurdles, but the good news is they're totally fixable with a few smart adjustments.
The trick is to think of the upscaled image as a new, high-quality starting point, not the finished product. The AI did the heavy lifting of generating all that new pixel data; now it’s your turn to polish it. Don't hesitate to jump back into Camera Raw for some final tweaks or use layer masks to selectively tone down the enhancement.
This is especially true with newer features. When Adobe Photoshop introduced Generative Upscale, it was a huge step forward for image enhancement, built to work with tools like Neural Filters and Photo Restoration. While the goal is to get great results with minimal effort, knowing how to make those final little corrections is what separates good from great. You can read more about Photoshop's AI innovations on petapixel.com.
Correcting Unnatural Textures
One of the most common things you'll see, particularly in portraits or product photos of fabrics, is an overly smooth or "plastic-like" texture. In its mission to crush noise, the AI can sometimes get a bit overzealous and wipe out the very details you wanted to preserve.
An easy and surprisingly effective fix is to add a subtle grain layer. This technique brings back a little organic texture, which tricks the eye into perceiving more detail and breaks up that tell-tale digital smoothness.
Create a new layer and fill it with 50% gray.
Change the layer's blend mode to Overlay or Soft Light.
Navigate to
Filter > Noise > Add Noise. Start with a tiny amount, maybe 2-4%, and make sure to use the Gaussian and Monochromatic settings.
This simple addition can make skin, clothing, and other surfaces look instantly more realistic. For e-commerce photography, where showing off texture is critical, I’d almost consider this step essential. If you want to nail your product shots from the very beginning, our guide on how to take professional product photos is a great place to start.
Fixing Artifacts and Color Shifts
Occasionally, the upscaling process can introduce small, distracting artifacts or slightly throw off the color balance. Instead of trying to patch these issues directly on the upscaled layer, you'll get much better results by using a layer mask.
Here's how: duplicate your original, un-upscaled layer and move it on top of the AI-enhanced version. Add a black layer mask to this top layer, which will hide it completely. Now, grab a soft, low-opacity white brush and gently paint back in areas from the original image to cover up any problem spots.
This method gives you surgical control. It allows you to keep the incredible detail from the photoshop ai upscale in areas like hair and eyes while blending back the original, untouched skin texture or background color where the AI might have struggled.
Your Photoshop AI Upscaling Questions Answered
When you start digging into Photoshop’s AI upscaling tools, a bunch of practical questions pop up. It's one thing to know the tools exist, but it's another to figure out which one to grab, when to use it, and how to sidestep its little quirks. Let's clear up some of the most common questions I hear from other designers and photographers.
Think of this as advice from someone who's spent countless hours in the trenches with these tools. We'll cover everything from rescuing old family photos to managing the technical side effects.
What’s the Best AI Method for Old, Low-Resolution Photos?
For those old, grainy, or heavily compressed photos, I almost always reach for Super Resolution in Camera Raw first. Its AI model is exceptionally good at looking at fuzzy, unclear details and figuring out what they should have looked like, rebuilding them in a way that feels surprisingly natural. It often brings back textures you thought were completely gone.
A pro tip: if you see any digital noise or weird artifacts pop up after the upscale, just use Camera Raw’s noise reduction sliders to smooth things out before you hit "Done." This lets you handle both the enhancement and the cleanup in one seamless step.
Can I Just Upscale One Part of an Image?
You absolutely can, and it's a great trick for making a specific subject pop. The key is to use layer masks to control exactly where the upscaling effect is applied.
Here’s my go-to workflow for this:
First, duplicate your image layer (Cmd/Ctrl + J). Never work on your original.
Run your chosen Photoshop AI upscale method on that new, duplicated layer.
Once the process finishes, add a layer mask to the upscaled layer and immediately fill it with black. This makes the entire upscaled effect invisible for now.
Finally, grab a soft-edged white brush and simply paint over the areas you want to reveal the sharp, upscaled details.
This technique is fantastic for creative control. You can end up with a tack-sharp subject against a background that retains its original, softer focus—a classic method for creating depth and drawing the viewer's eye.
Does AI Upscaling Make My Files Bigger?
Oh, yes. The file size increase is significant. When you use a tool like Super Resolution, you're doubling the image's width and height. That means you are effectively quadrupling the total number of pixels.
To put that in perspective, a photo that was a reasonable 10 MB can easily balloon to 40 MB or even more. You really need to keep this in mind for storage and especially for web use, where massive files will kill your page load speed. Always make sure to export a separate, web-optimized version when you're finished.
Is There a Limit to How Much I Can Upscale?
Technically, you can stack upscaling processes, but you'll see the quality start to break down very quickly. Each time you run an upscale, you risk amplifying any existing flaws and introducing new digital artifacts. The result is often an over-processed, unnatural-looking image.
Super Resolution, in particular, is meant to be a one-and-done operation. For the best, cleanest results, run it once at the start of your editing process. If you find you still need an even larger file after that, you could try using Preserve Details 2.0 for a final enlargement, but make sure you zoom in to 100% and scrutinize the details. You have to be your own quality control.
Ready to skip the tedious editing and generate stunning, on-model photoshoots in minutes? Look Atlas uses AI to turn your simple product pictures into hyper-realistic lifestyle and studio images that are proven to boost sales. Create an entire catalog of high-impact visuals without the cost or complexity of a traditional photoshoot. Learn more and start creating today at https://www.lookatlas.com.
Article created using Outrank